
Narrowband filters have a long tradition in astronomy. The first Ultra High Contrast (UHC) filters for visual astronomy appeared in the early 1970ies. With the advent of CCD cameras, narrowband filters became an important tool for advanced deep space imaging, but only recently, they started to make their way into landscape astrophotography.
What is a Narrowband Filter?
These highly specialized filters transmit only specific wavelengths, like e.g. the H-alpha, Oiii or Sii lines of emission nebulae. There is no clear definition of the maximum passband width, but most astrophotographers agree that a filter with a passband smaller than roughly 12nm is a narrowband filter.
Scientific researchers use narrowband filters to measure and visualize the distribution of different gases. The most common use, however, is deep space astrophotography, where they are an important tool to capture faint emission nebulae. The famous “Pillars of Creation” from the Hubble Space Telescope are an excellent example of an image made from narrowband data, where different wavelengths are assigned to the red, green and blue color channels, resulting in a so-called false color Hubble-Palette image.
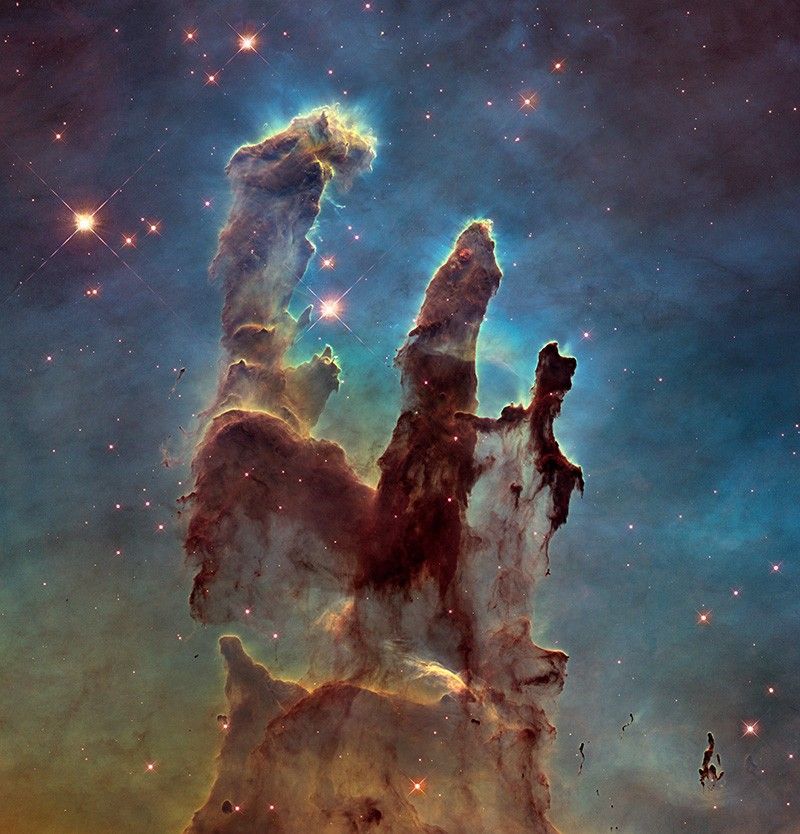
Deep space astrophotographers often apply the same technique to produce false color images in the Hubble-Palette from their narrowband data.
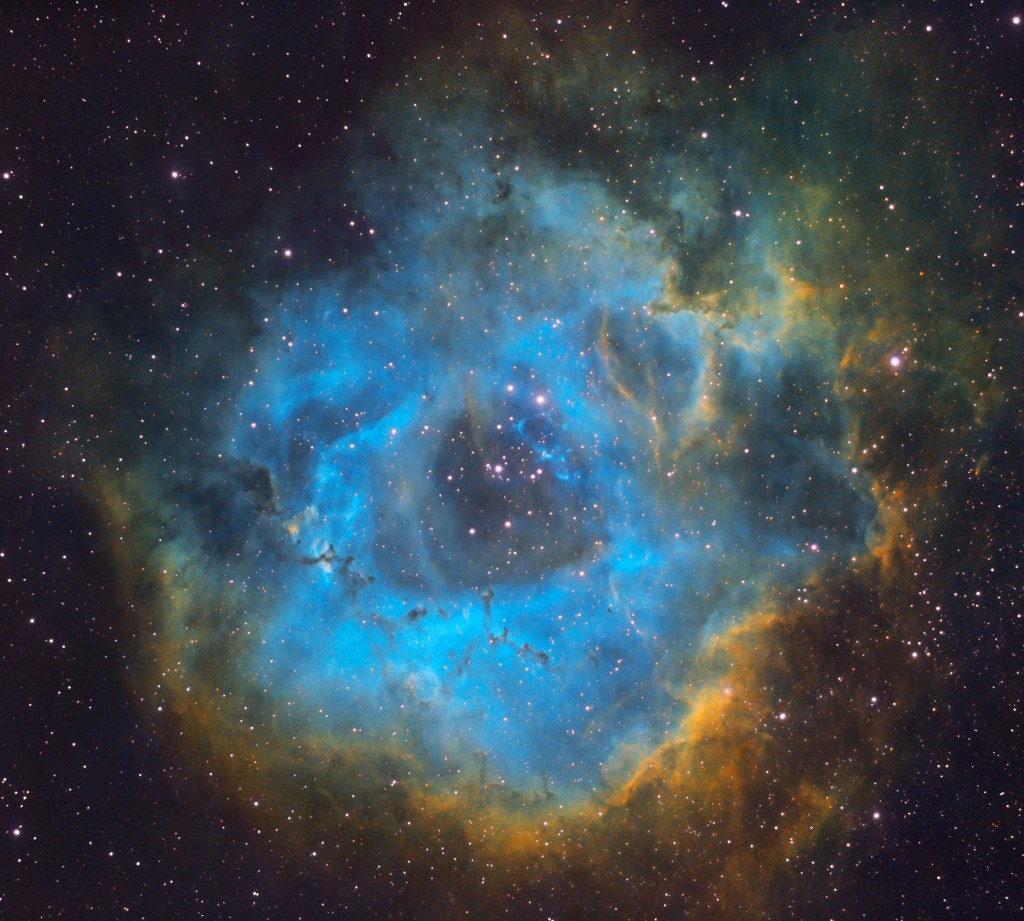
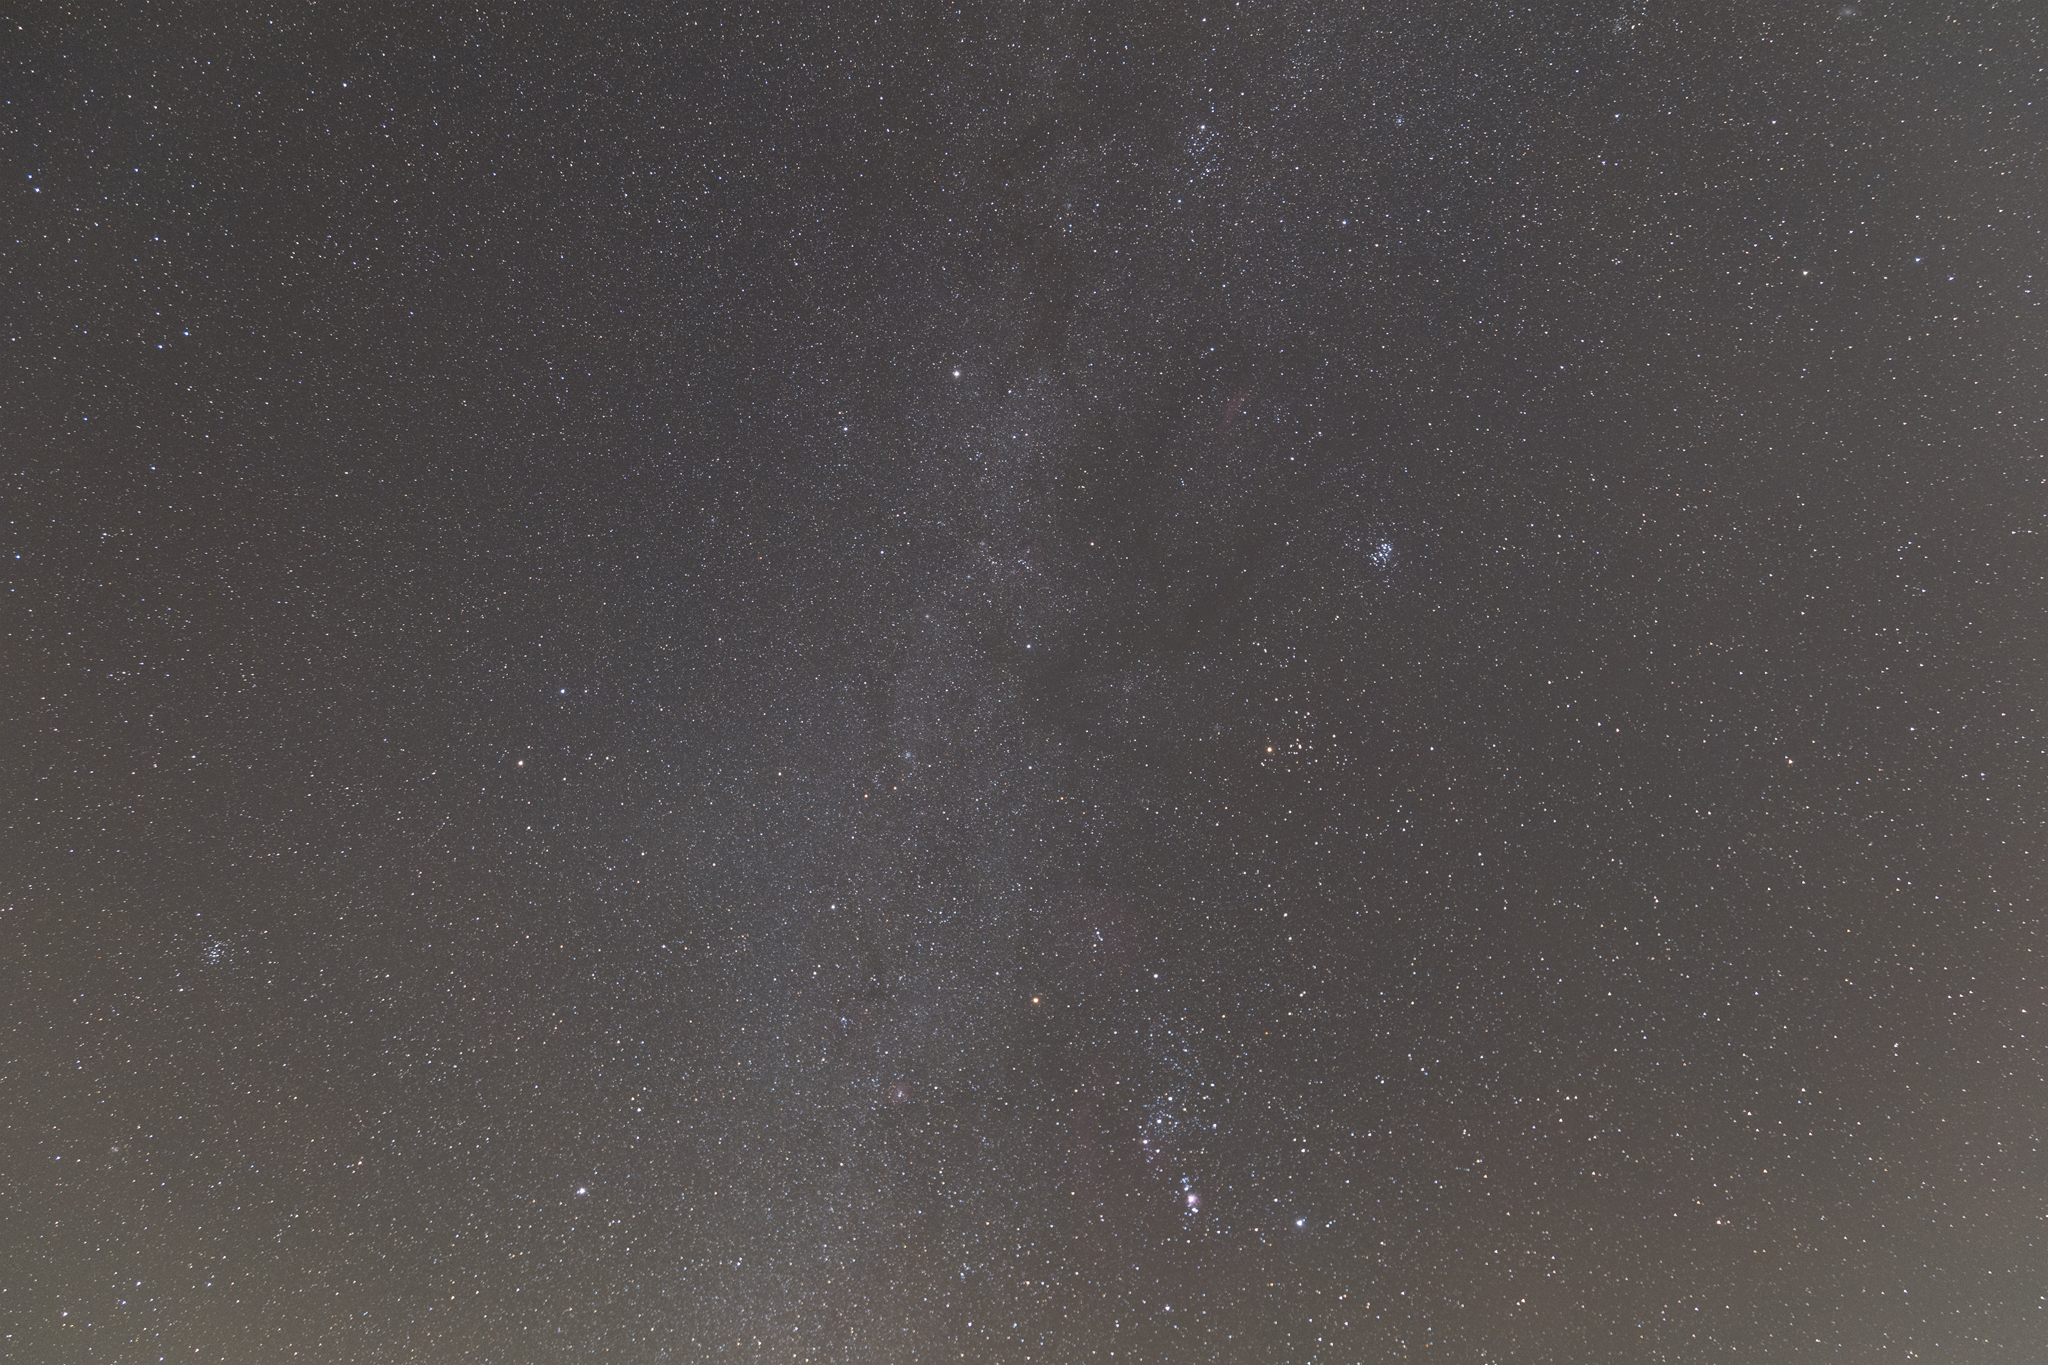
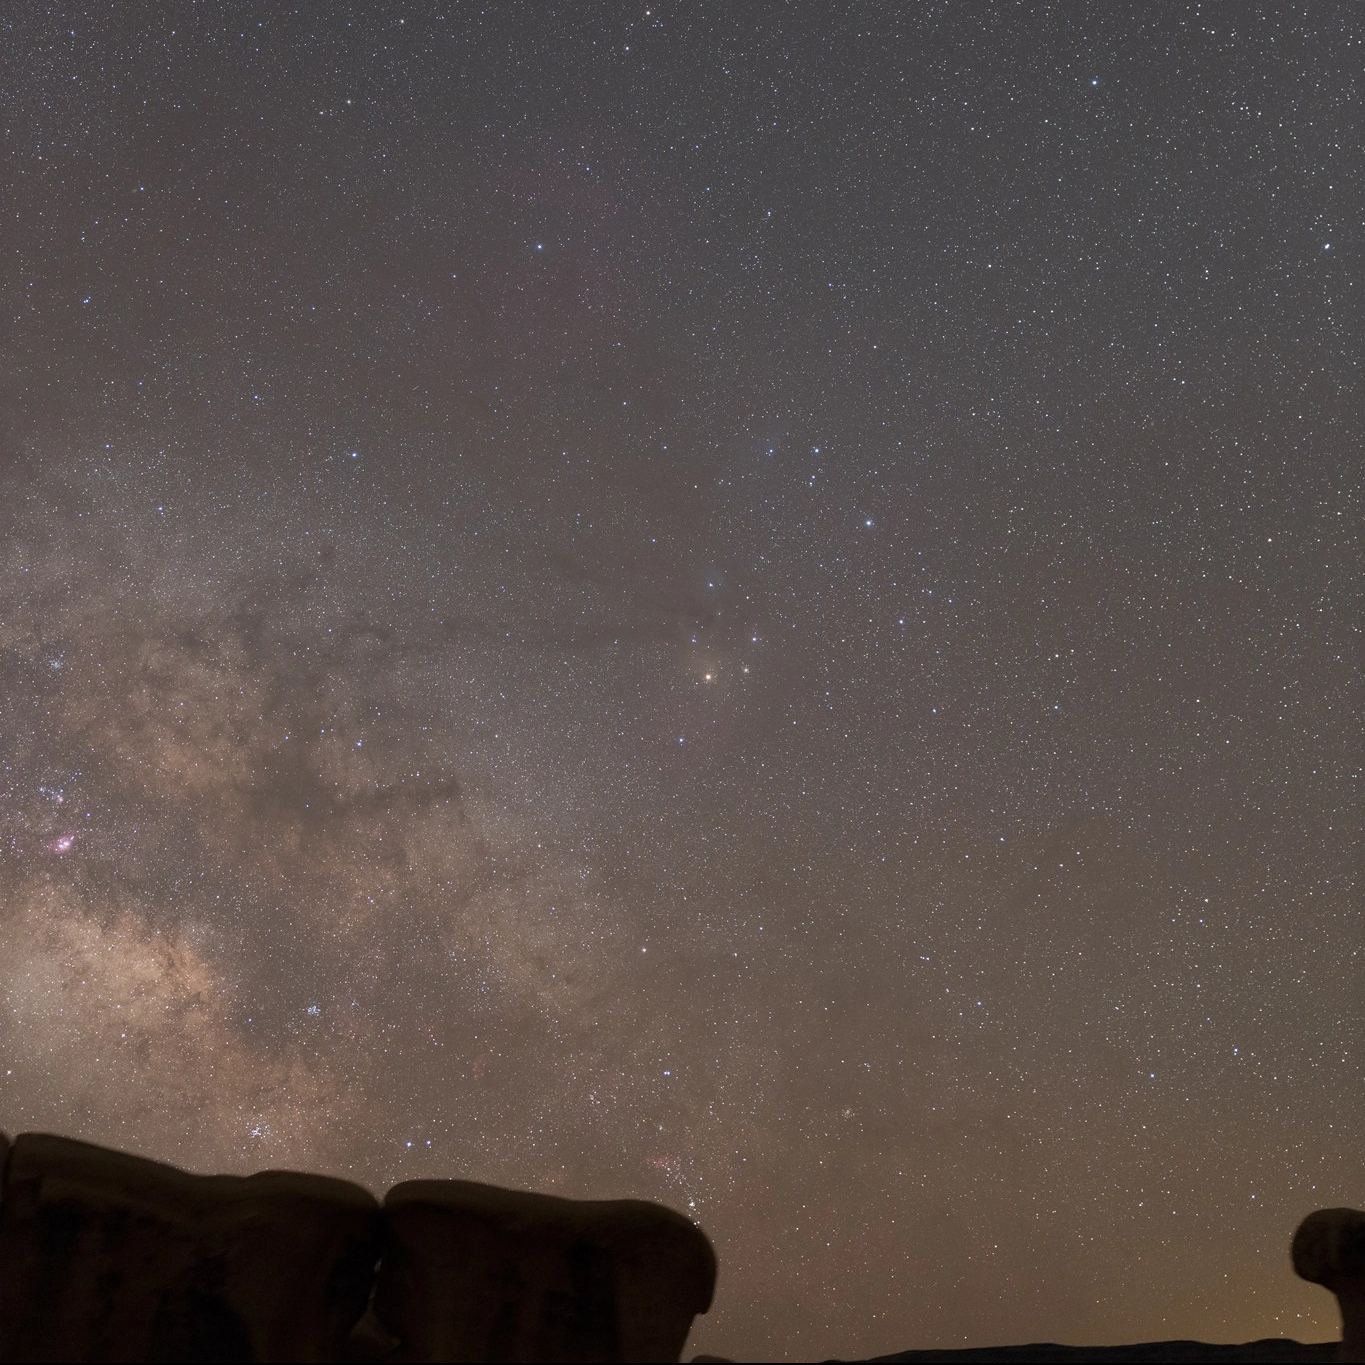
(2hrs integration time, Bortle class 5 site)
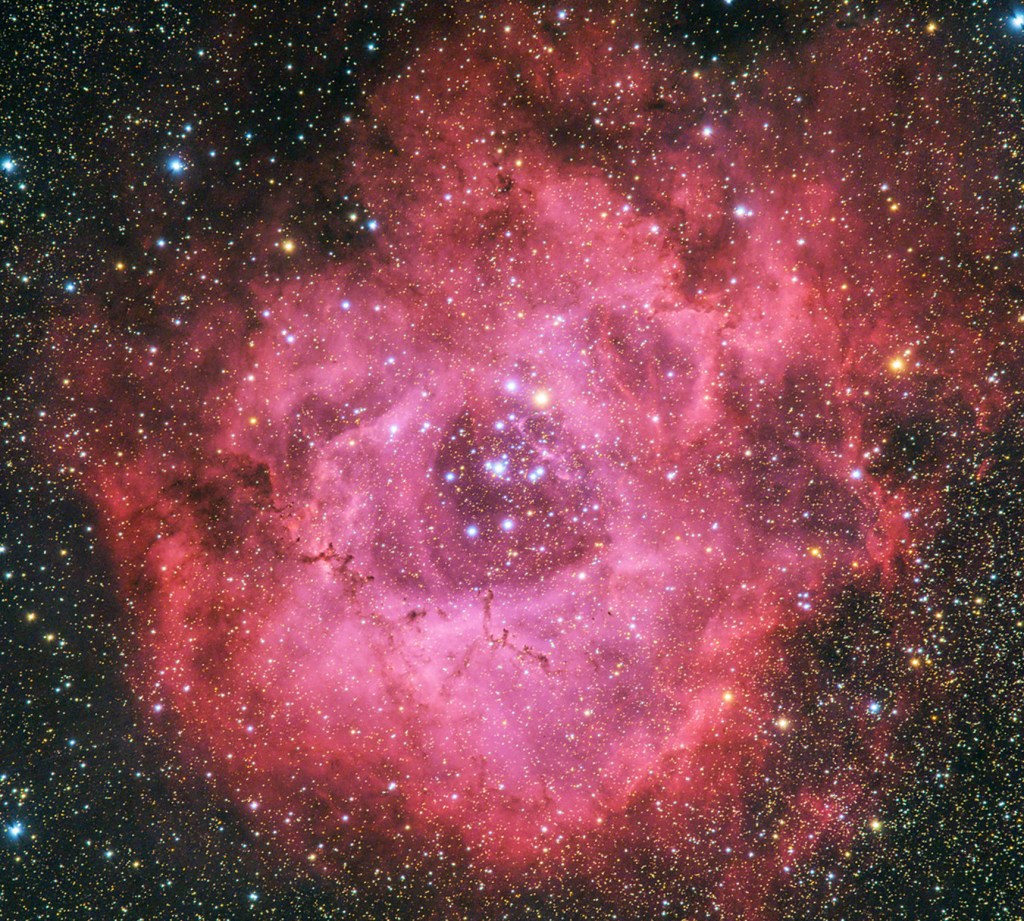
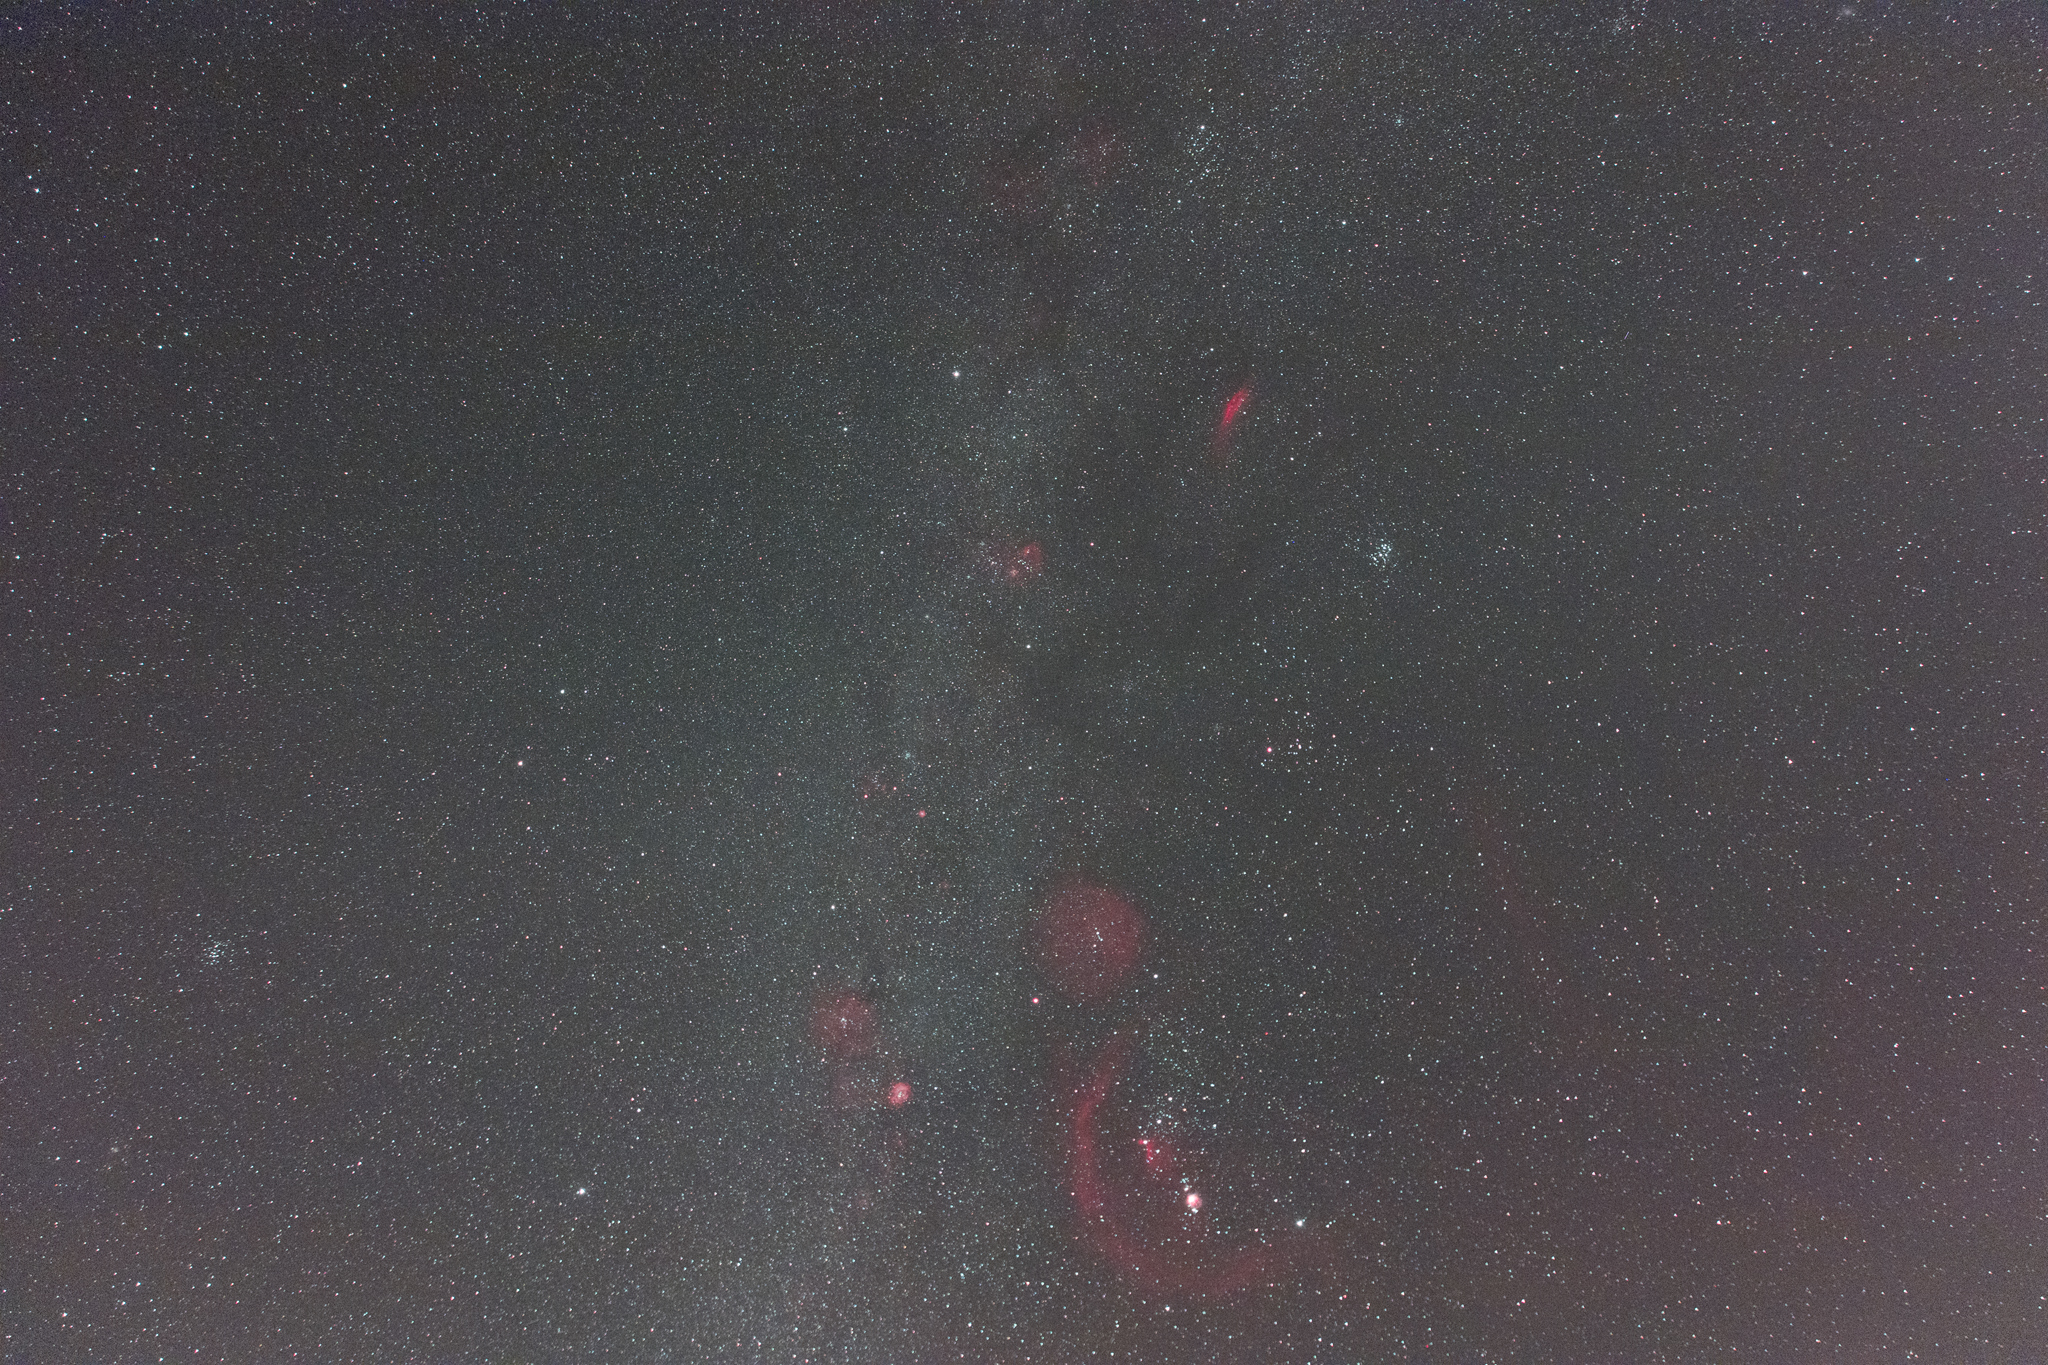
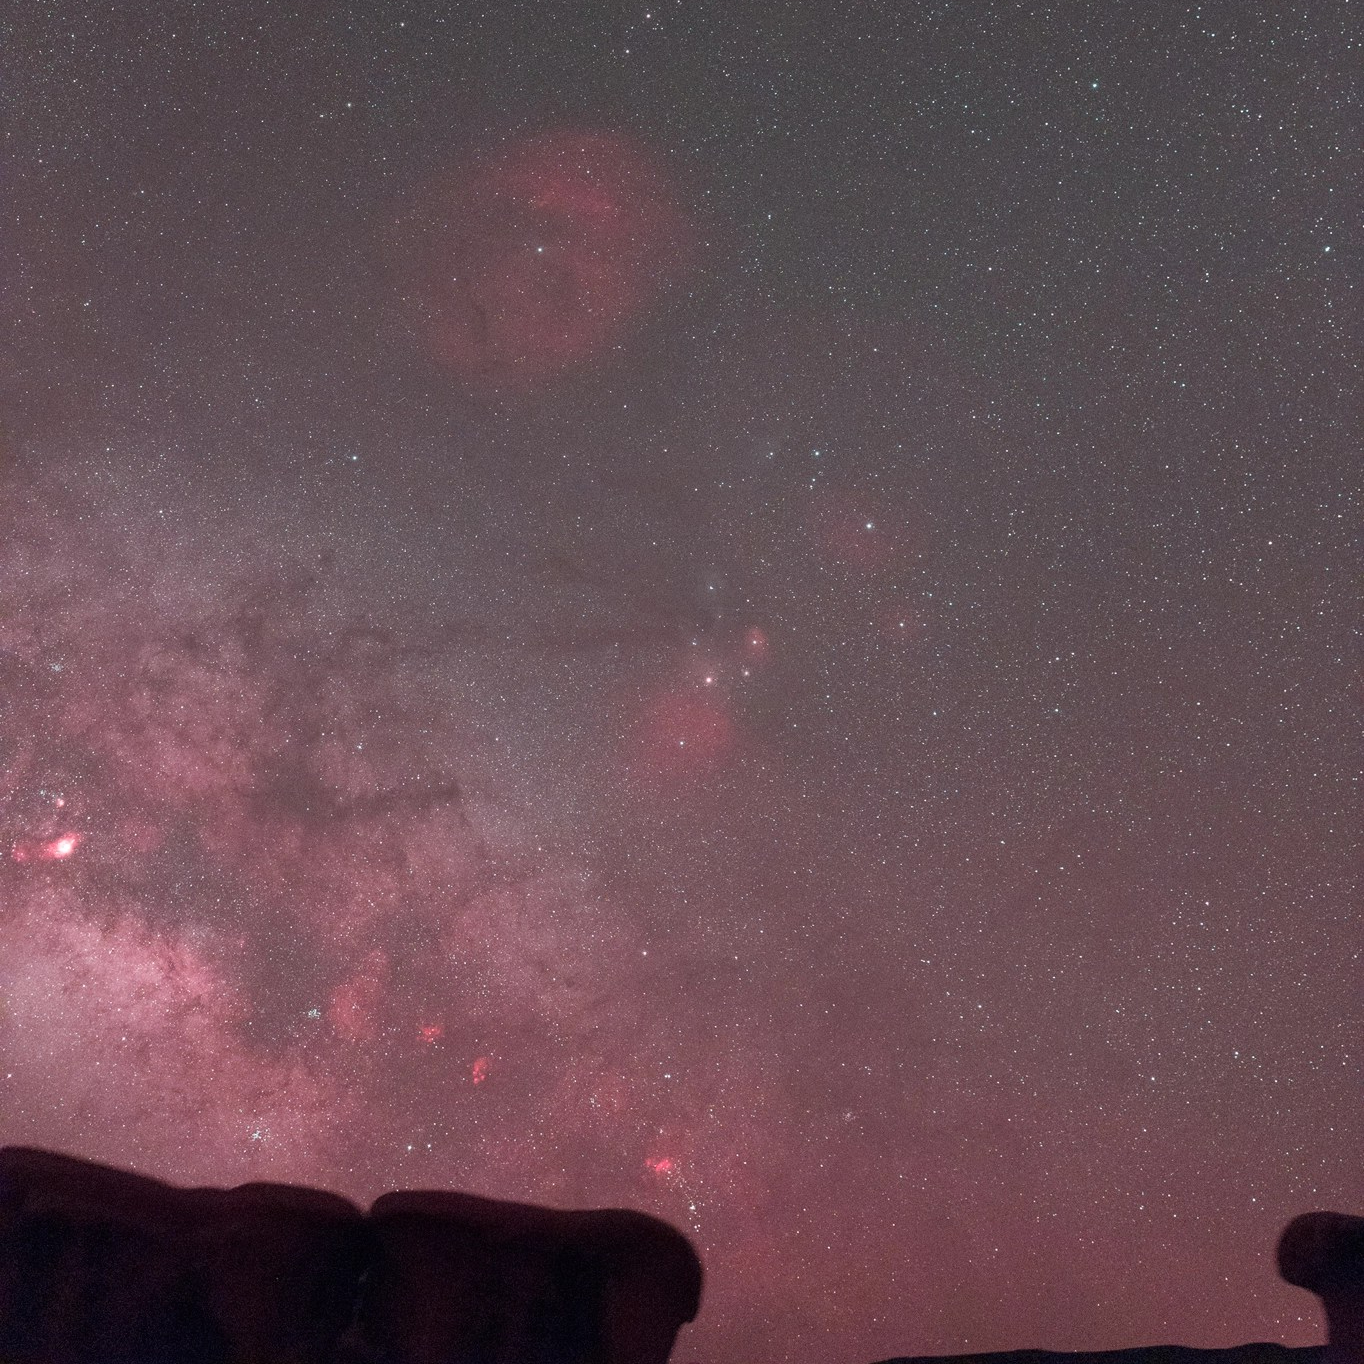
(4hrs integration time, Bortle class 3 site)
Narrowband vs Light Pollution Filters
The fact that even space telescopes are using narrowband filters shows that they are more than light pollution filters. While broadband light pollution filters let pass almost all light and only block the wavelengths where light pollution is worst, narrowband filters block all light, except the astronomically important wavelengths.
Advantages of Narrowband Filters
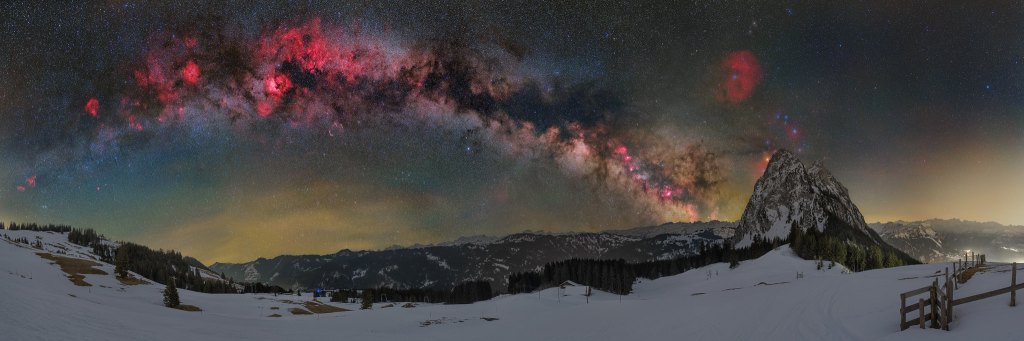
Narrowband filters greatly reduce the amount of broadband light reaching the sensor, thus allowing longer exposures to capture more of the desired nebula signal without burning out the sky background. A narrowband filter, therefore, greatly increases contrast between the sky background and emission nebulae, even under completely dark skies. In an equally bright exposure, this makes the emission nebulae stand out stronger.
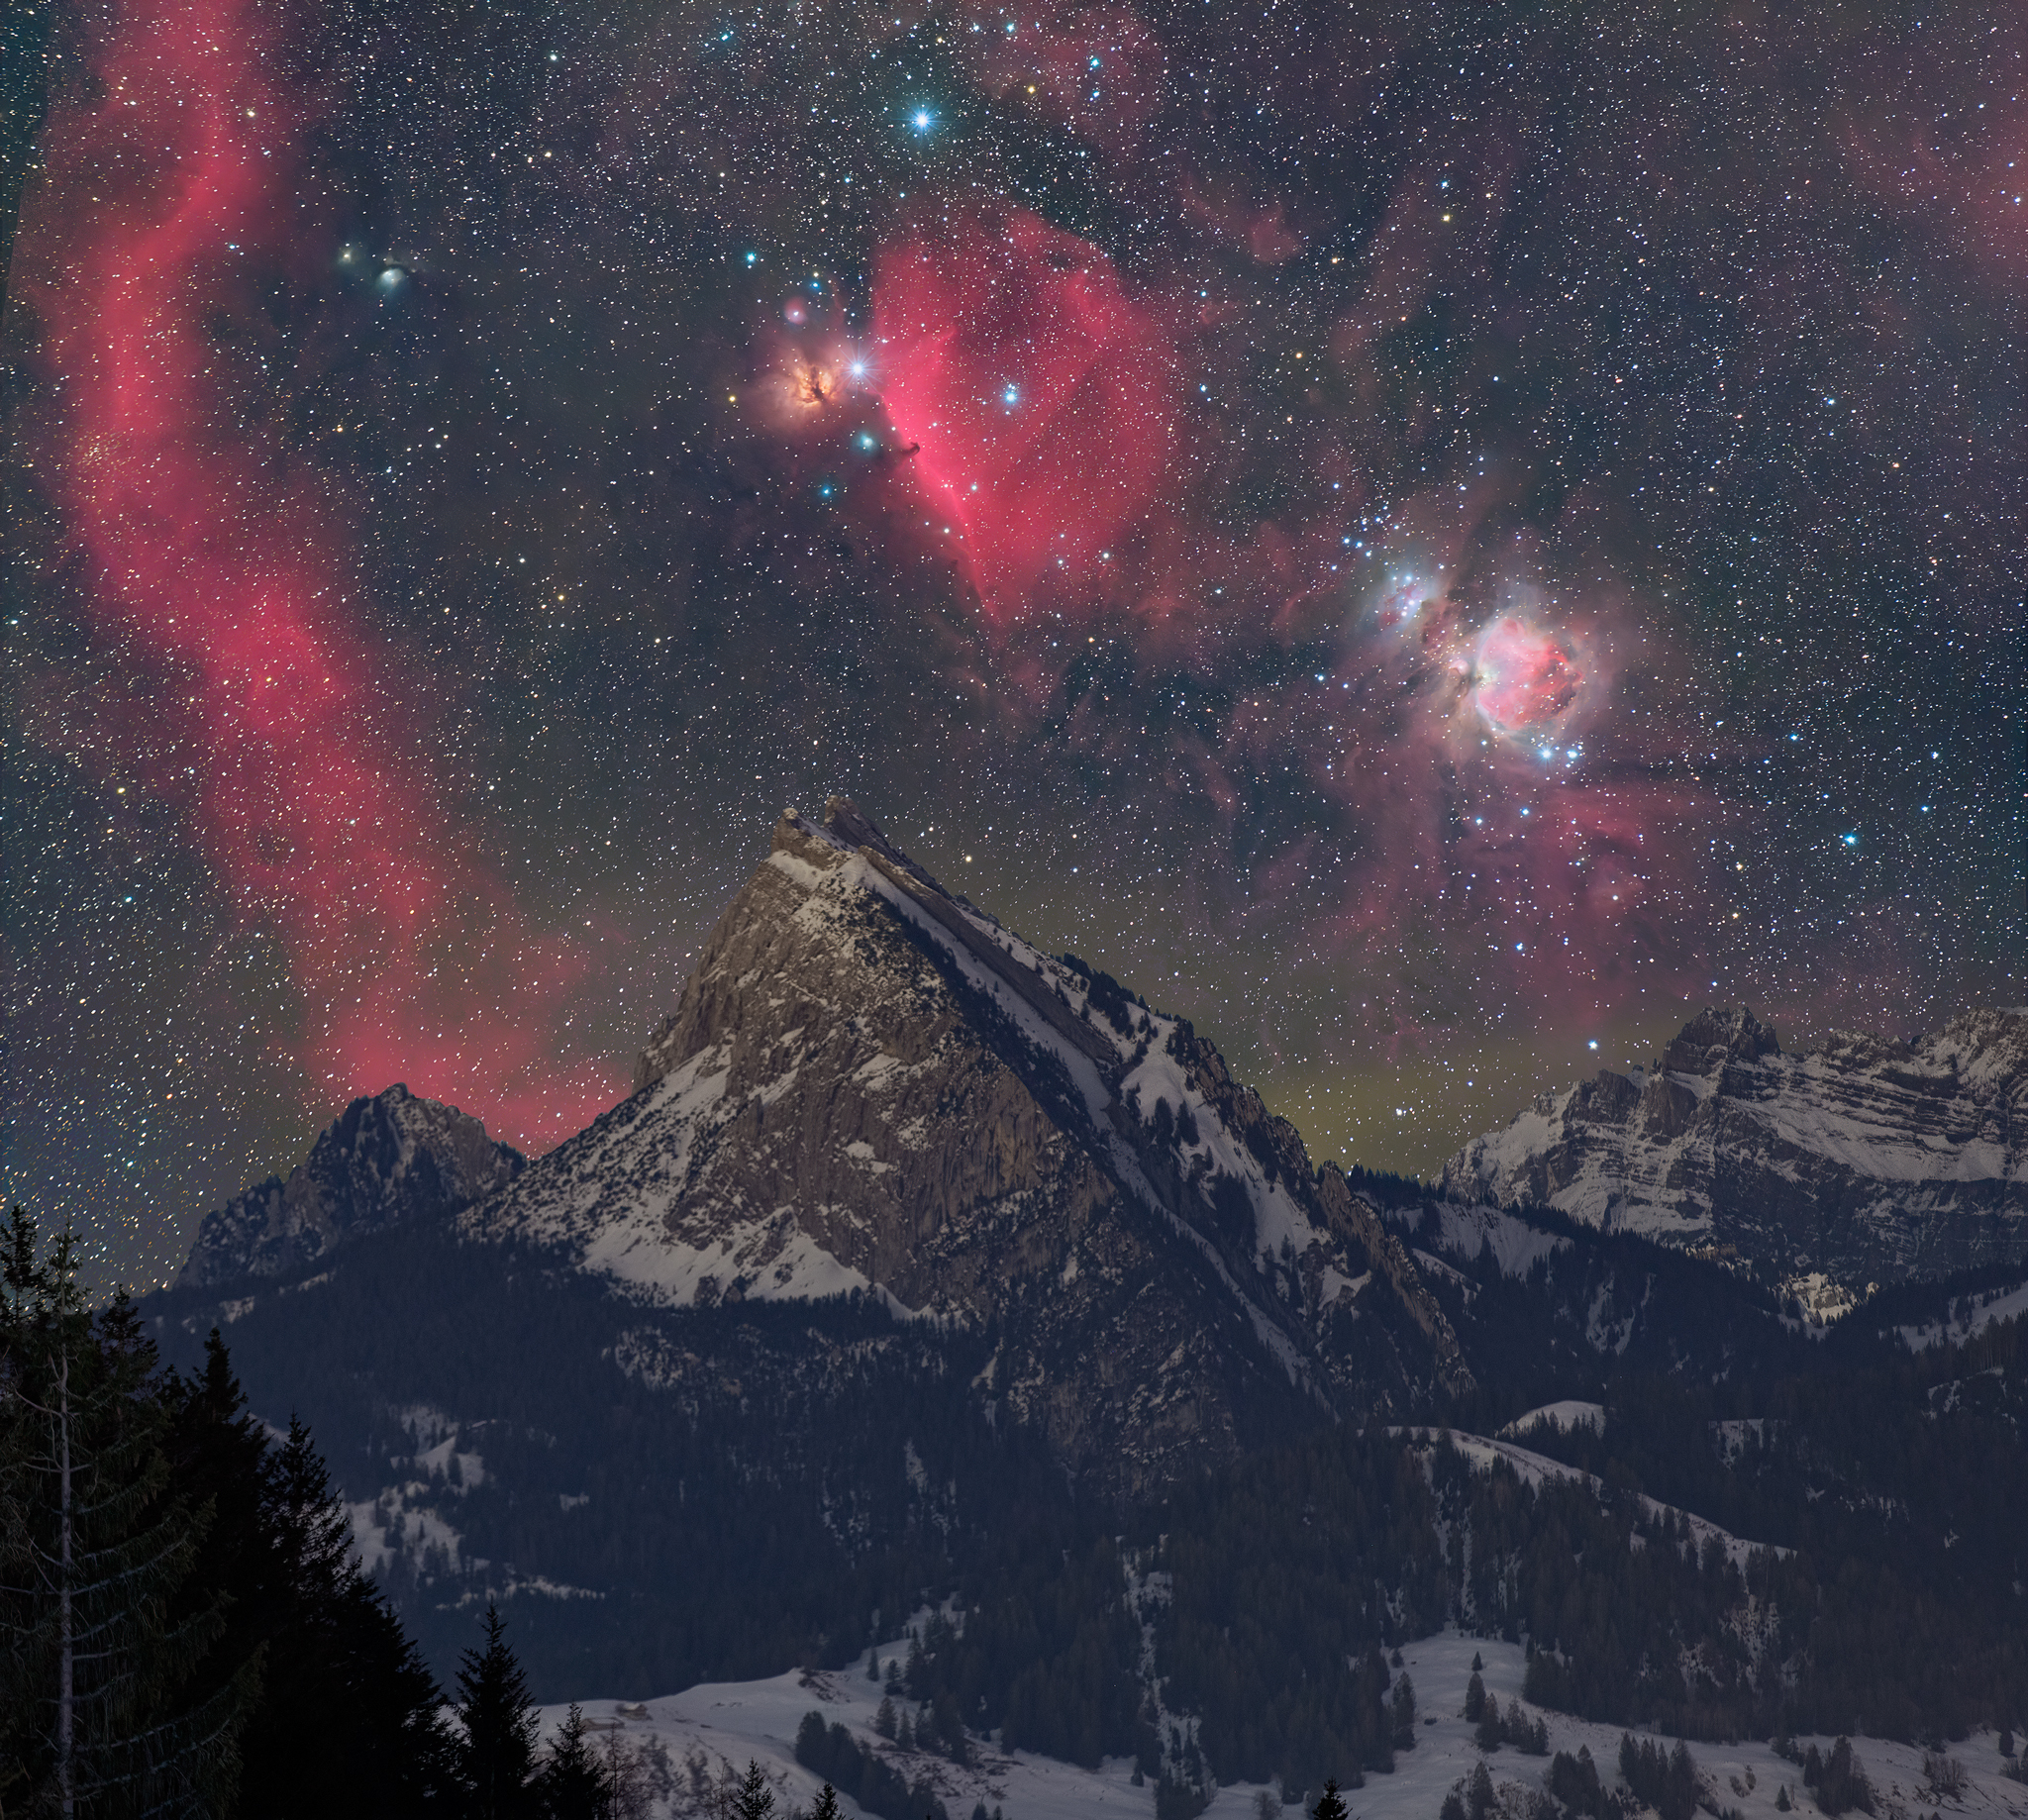
(astro-modified Canon EOS R)

Drawbacks of Narrowband Filters
Almost all tools in astronomy have their complications, and narrowband filters are no exception. Unfortunately, they have quite a few drawbacks:
Not suitable for broadband targets
As narrowband filters transmit only certain wavelengths, they are a bad choice for broadband targets like star clusters, galaxies, or reflection nebulae.
Expensive
Narrowband filters are a very specialized breed and, therefore, much more expensive than regular photographic filters. A high-quality, large size filter can be more expensive than a camera or telescope.
Prone to produce gradients, if light passes them at a slant angle
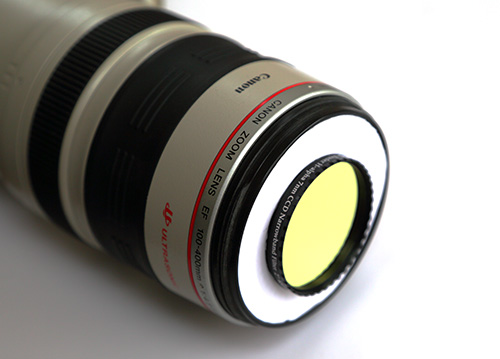
If light passes a narrowband filter at an angle other than vertical, the filter characteristics change. With wide-angle lenses, this can produce gradients if a narrowband filter is used as a screw-on filter in front of a lens. Nevertheless, this is a solution that has been applied by some photographers to enable them to use threaded narrowband filters with telephoto lenses.
Not available in sizes above 52mm
Because large size filters quickly become prohibitively expensive and due to the gradients, they tend to cause as front end filters, most manufactures do not produce narrowband filters compatible with front-end filter threads and the maximum diameter is usually 52mm. If attached as a front-end filter, this results in stopping down the aperture of the lens.
Back end filters need space and affect back focus distance
Due to the reasons stated above, narrowband filters are traditionally used as back-end filters between a telescope and the camera sensor. Used like this, the filter holder and the filter glass itself change the back focus distance of the optical train. With a telescope, this is not a problem, as the back focus distance is adjustable. With a DSLR camera and lens, however, there is no room to insert a traditional filter holder, as back focus distance can not be changed.
That’s why clip-in filters were invented. While these sound like a great solution, they have severe drawbacks, too.
- The filter glass throws off back focus distance, resulting in elongated stars along the edges of the frame. The thicker the filter and the shorter the focal lenth, the worse the aberrations get.
- Every filter change requires removal of the lens. While this may not sound like a big problem, exposing the sensor to the elements and fiddling with a clip-in filter in the dark and with possibly very cold fingers doesn’t sound very appealing to me.
- A clip-in in filter will throw off focus, and refocusing through a narrowband filter may be impossible to achieve, except on a very bright star, which may not be in your field of view.
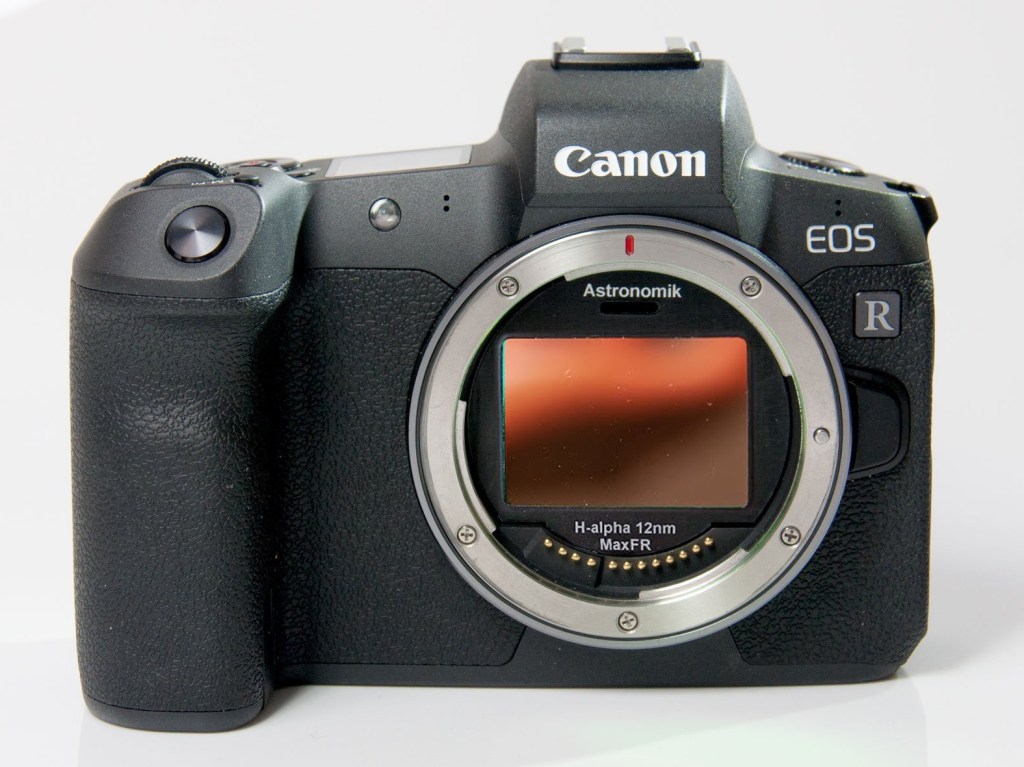
into a Canon EOS-R
Waste of imaging time and resolution with single passband filters on color cameras
Traditionally, narrowband filters with a single passband are used with monochrome cameras. A color camera is considered a bad choice for such filters, as at least two-thirds of the pixels on a sensor with a Bayer mask will not record any useful signal. If e.g. shooting with a Hydrogen-alpha filter, the green and blue pixels will not record any signal as just the red H-alpha wavelength is reaching the sensor.
Newer multi passband filters mitigate the problem and make color cameras a valuable option, though.
Color balance is destroyed
As mentioned above, multi passband filters made one-shot color cameras a valuable option, but as even these multi passband filters block most of the light spectrum, they destroy color balance beyond repair.
An astrophotographer can bow with the blow and produce false color images (e.g. in the Hubble Palette), or he has to capture a separate RGB image and find a way to combine the RGB and narrowband data.
Due to passband shift, some narrowband filters are not ideal for fast optical systems
With fast optical systems, light passes even back-end filters at slightly tilted angles. As mentioned, this changes the characteristics of the filter, i.e. it shifts the passband towards shorter wavelengths. This effect, called blueshift, can cause the narrow passband of a filter to shift away from the target wavelength, thus effectively blocking the light we want to capture. The problem can be solved by offsetting the passband of the filter to match the target wavelength after the blueshift. Some manufacturers produce such narrowband filters for fast systems, but these can not be used with stopped down lenses or slower telescopes.
Longer exposure times needed
Filters block light and narrowband filters block most of the light. This results in considerably longer exposure times when working with a narrowband filter. A factor 10 or even more is common, resulting in exposures that can take up to 20 minutes. Shooting with narrowband filters, therefore, requires a tracking mount. Some photographers choose to increase gain or ISO to keep exposure times within lower limits, but the price for this is more noise and less dynamic range in the narrowband exposures.
Focusing can be a challenge
Due to the lack of light when working with a narrowband filter, focusing can be a challenge and may require test exposures instead of working in live view on a camera screen.
Drop-in Adapters for Mirrorless Cameras
The drawbacks described above, especially the fact that there is no good solution to use narrowband filters with photographic lenses on a DSLR camera, are the reason why narrowband filters, until recently, have not found their way into landscape astrophotography. Fortunately, this has changed with the introduction of mirrorless cameras.
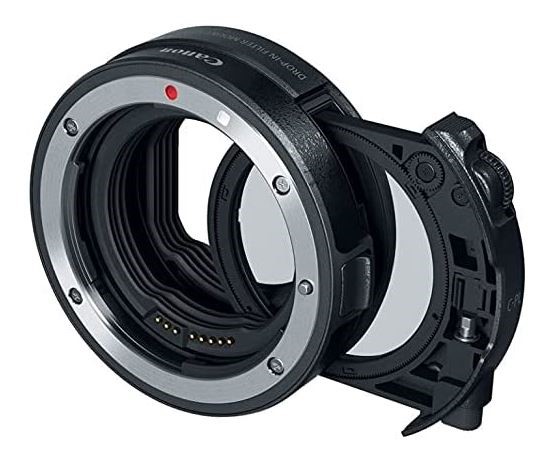
Mirrorless technology allows building smaller and slimmer cameras. To enable a mirrorless camera to work with DSLR lenses, camera manufacturers have introduced adapters that go between the camera body and the lens. These adapters connect different mount systems and reestablish correct back focus. As a side effect, such adapters open up space and allow the insertion of drop-in filters.
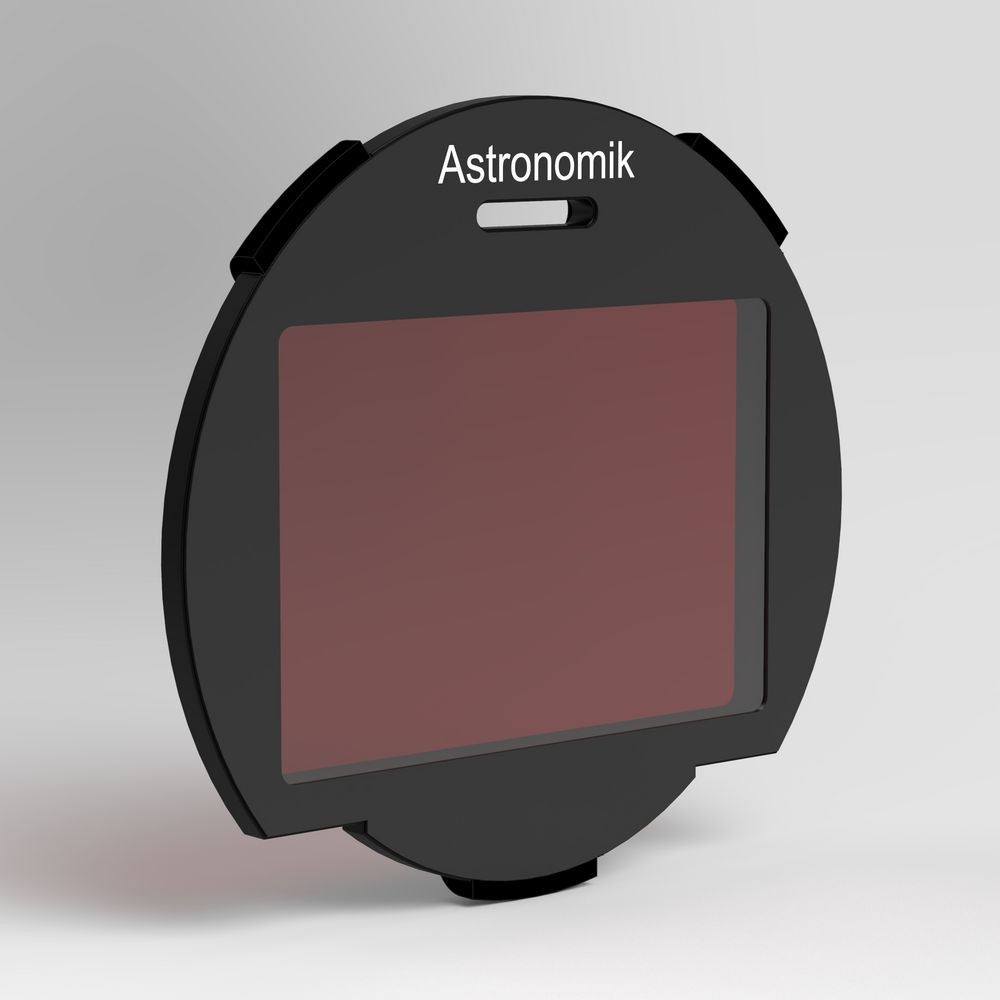
With the introduction of their mirrorless RF mount, Canon introduced such a drop-in adapter. It is sold in connection with a circular polarizing or a variable neutral density filter but can also be used with specialized astronomical third-party filters that match the optical width of the original Canon filters. Unfortunately, the availability of such astronomical filters is still rather limited.
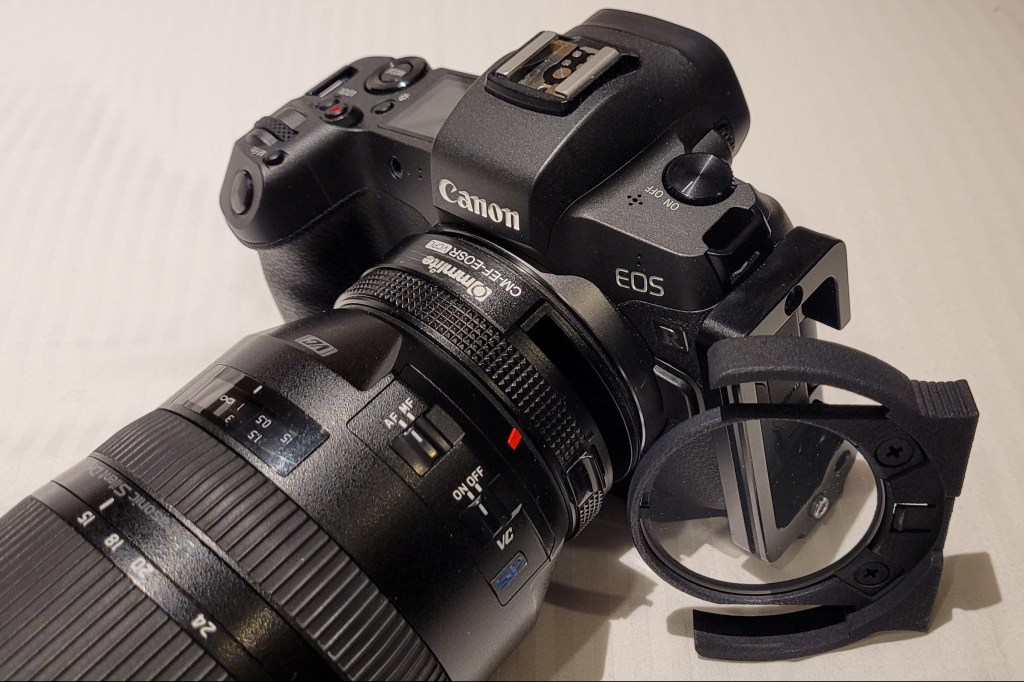
Other manufacturers have chosen to produce their own adapters, fine-tuning the back focus distance to fit their existing filter selection. Unfortunately, these simple adapters normally do not communicate with the camera or lens. This means that e.g. setting the aperture on a non-manual lens may be a problem.
There certainly is room for improvement for innovative filter manufacturers in this area.

Besides avoiding aberrations due to back focus issues, such a filter system enables a photographer to switch between different filters very conveniently and without removing the lens. If the used filters are parfocal, there is no need to refocus after a filter change, and focusing can be done with a suitable clear glass filter.
It also avoids focusing problems with narrowband filters due to lack of light.
Capturing Narrowband-Enhanced Nightscapes
Due to the longer exposure times when shooting with narrowband filters, a tracking device is required to avoid star trailing. The longer the focal length and exposure time, the more precise the tracking needs to be. For landscape astrophotography with fast wide angle and moderate telephoto lenses, a simple star tracker will do the job nicely.
As narrowband filters change color balance beyond repair and as a false color sky over a natural color foreground looks weird, it is recommended to combine narrowband data with unfiltered exposures to achieve pleasing results.
This data combination is much easier if the field of view of the filtered exposures matches the unfiltered frames. With a tracking mount, this is easy to achieve by switching filters without moving the camera or shutting down the tracker. For panoramas, the filtered and unfiltered frames are captured back to back in the same way before panning the camera to the next panel. This technique requires constant filter changes, but thanks to the drop-in adapter and parfocal filters, this only takes a few seconds.

An option that requires less filter changes might be the use of an automated panorama head with tracking capability, like e.g. the Benro Polaris. With such a device, it should be possible to capture the entire filtered and unfiltered panoramas separately, with a single filter change in between. The author however as no hands-on experience with such a mount.
Pre-processing the Narrowband and RGB data sets
A full processing tutorial is beyond the scope of this article, as the workflow depends on the software used and contains many non-narrowband specific techniques. There are, however, a few things that are worth noting.
Unfiltered (RGB) and narrowband data are combined after pre-processing the data sets separately. For the combination, the two images have to match, though. Aligning the filtered and unfiltered sequences to the same reference frame before stacking and pre-processing them individually ensures that the data sets match perfectly.
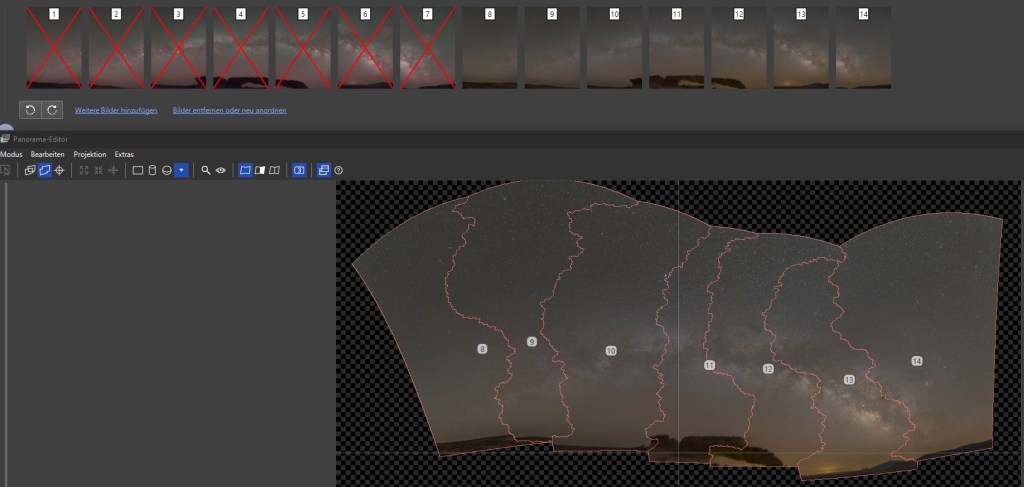
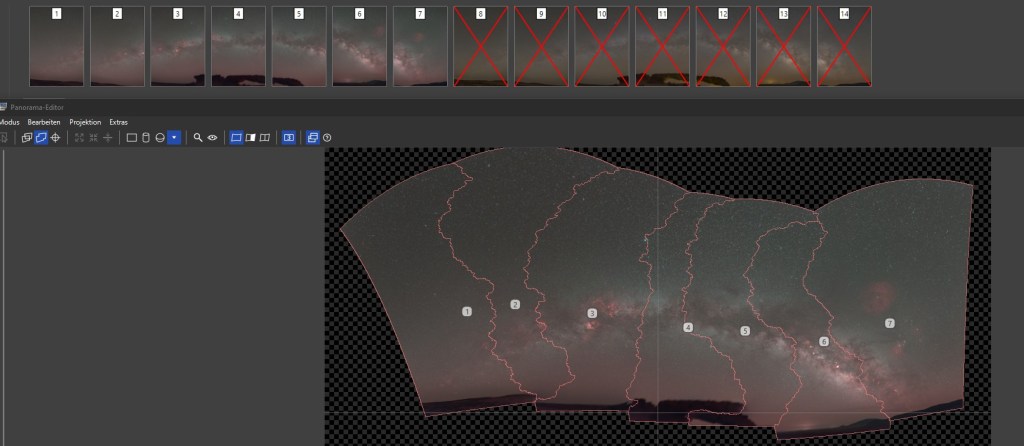
Panoramas are more complex. Here, the data sets of each individual panel are aligned and stacked in the same way as the single frames described above. Importing all unfiltered and filtered stacks together into a panorama stitching software, like e.g. PTGui ensures that the program calculates the stitching considering both data sets. By deselecting either the filtered or unfiltered sets, it is now possible to save two matching panoramas for further processing and combination.
Photoshop Process for Combining Unfiltered and Narrowband Data
Both the processing of the data sets itself and the data combination can be done in different programs, like e.g. Photoshop, Astro Pixel Processor, PixInsight or SIRIL, to name just a few. Most of these programs contain automated routines or accept plug-ins for narrowband-RGB combinations. Many of these certainly produce good results, but as users of specialized astrophotography processing software and plug-ins probably already know the basics of NB-RGB combination, I would like to share a possible manual Photoshop blending process:
While most astrophotographers prefer to combine the data in their linear state, this Photoshop workflow uses fully processed images. This has the advantage that the effect of the blending is immediately visible, which helps to fine tune the results.
Stars in narrowband images are slightly bloated and have no or wrong colors. That’s why the stars are best removed from the narrowband image before combining it with the unfiltered RGB image. There are specialized programs and plug-ins, like e.g. starnet or starXterminator that do a great job with star removal by using AI routines. I highly recommend these programs over older techniques, like e.g. using the Dust and Scratches filter in Photoshop.
There are several ways to combine a starless narrowband image with an unfiltered RGB image, and there is no single workflow for all situations and with all filters. The process requires a flexible approach and some try and error. Sometimes, like when e.g. adding data from a single bandpass Ha filter, it may be better to work with individual color channels, while data from multi bandpass filters may allow a global combination as RGB image.
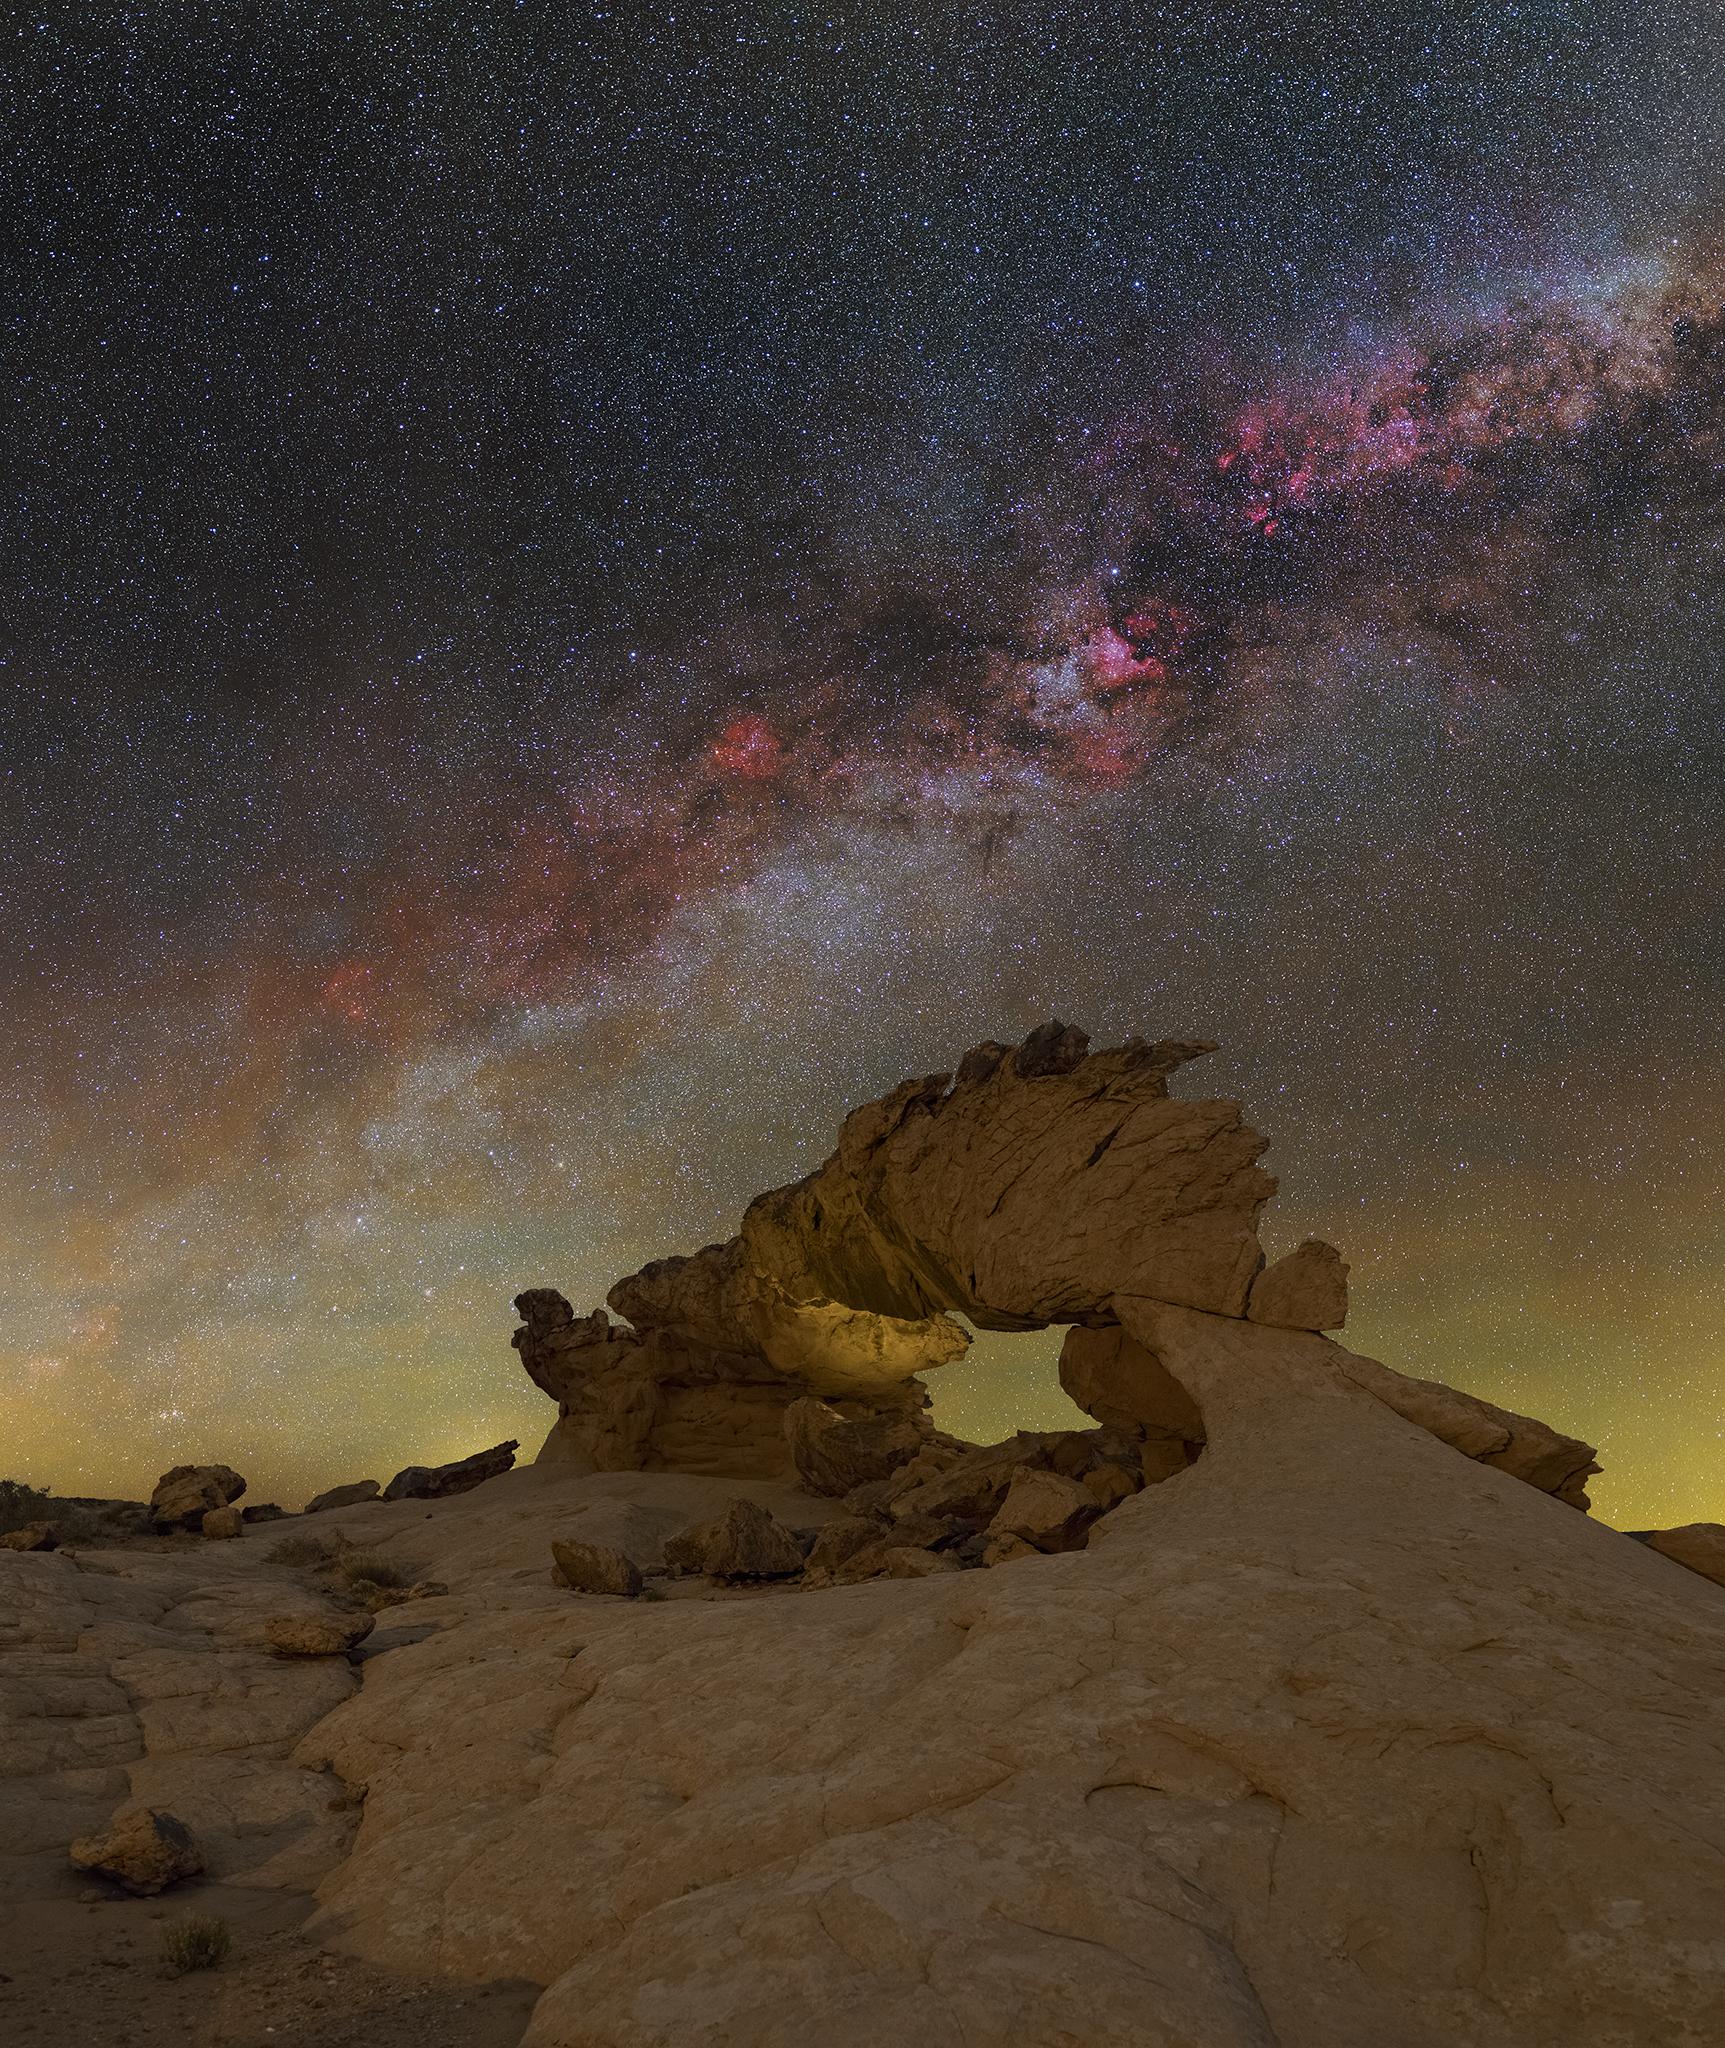
The aim of the process is in any case to enhance the emission nebulae with data from the narrowband image while protecting the stars and broadband structures of the unfiltered RGB image. In other words, we brighten the unfiltered RGB image with the nebula data from the narrowband image.
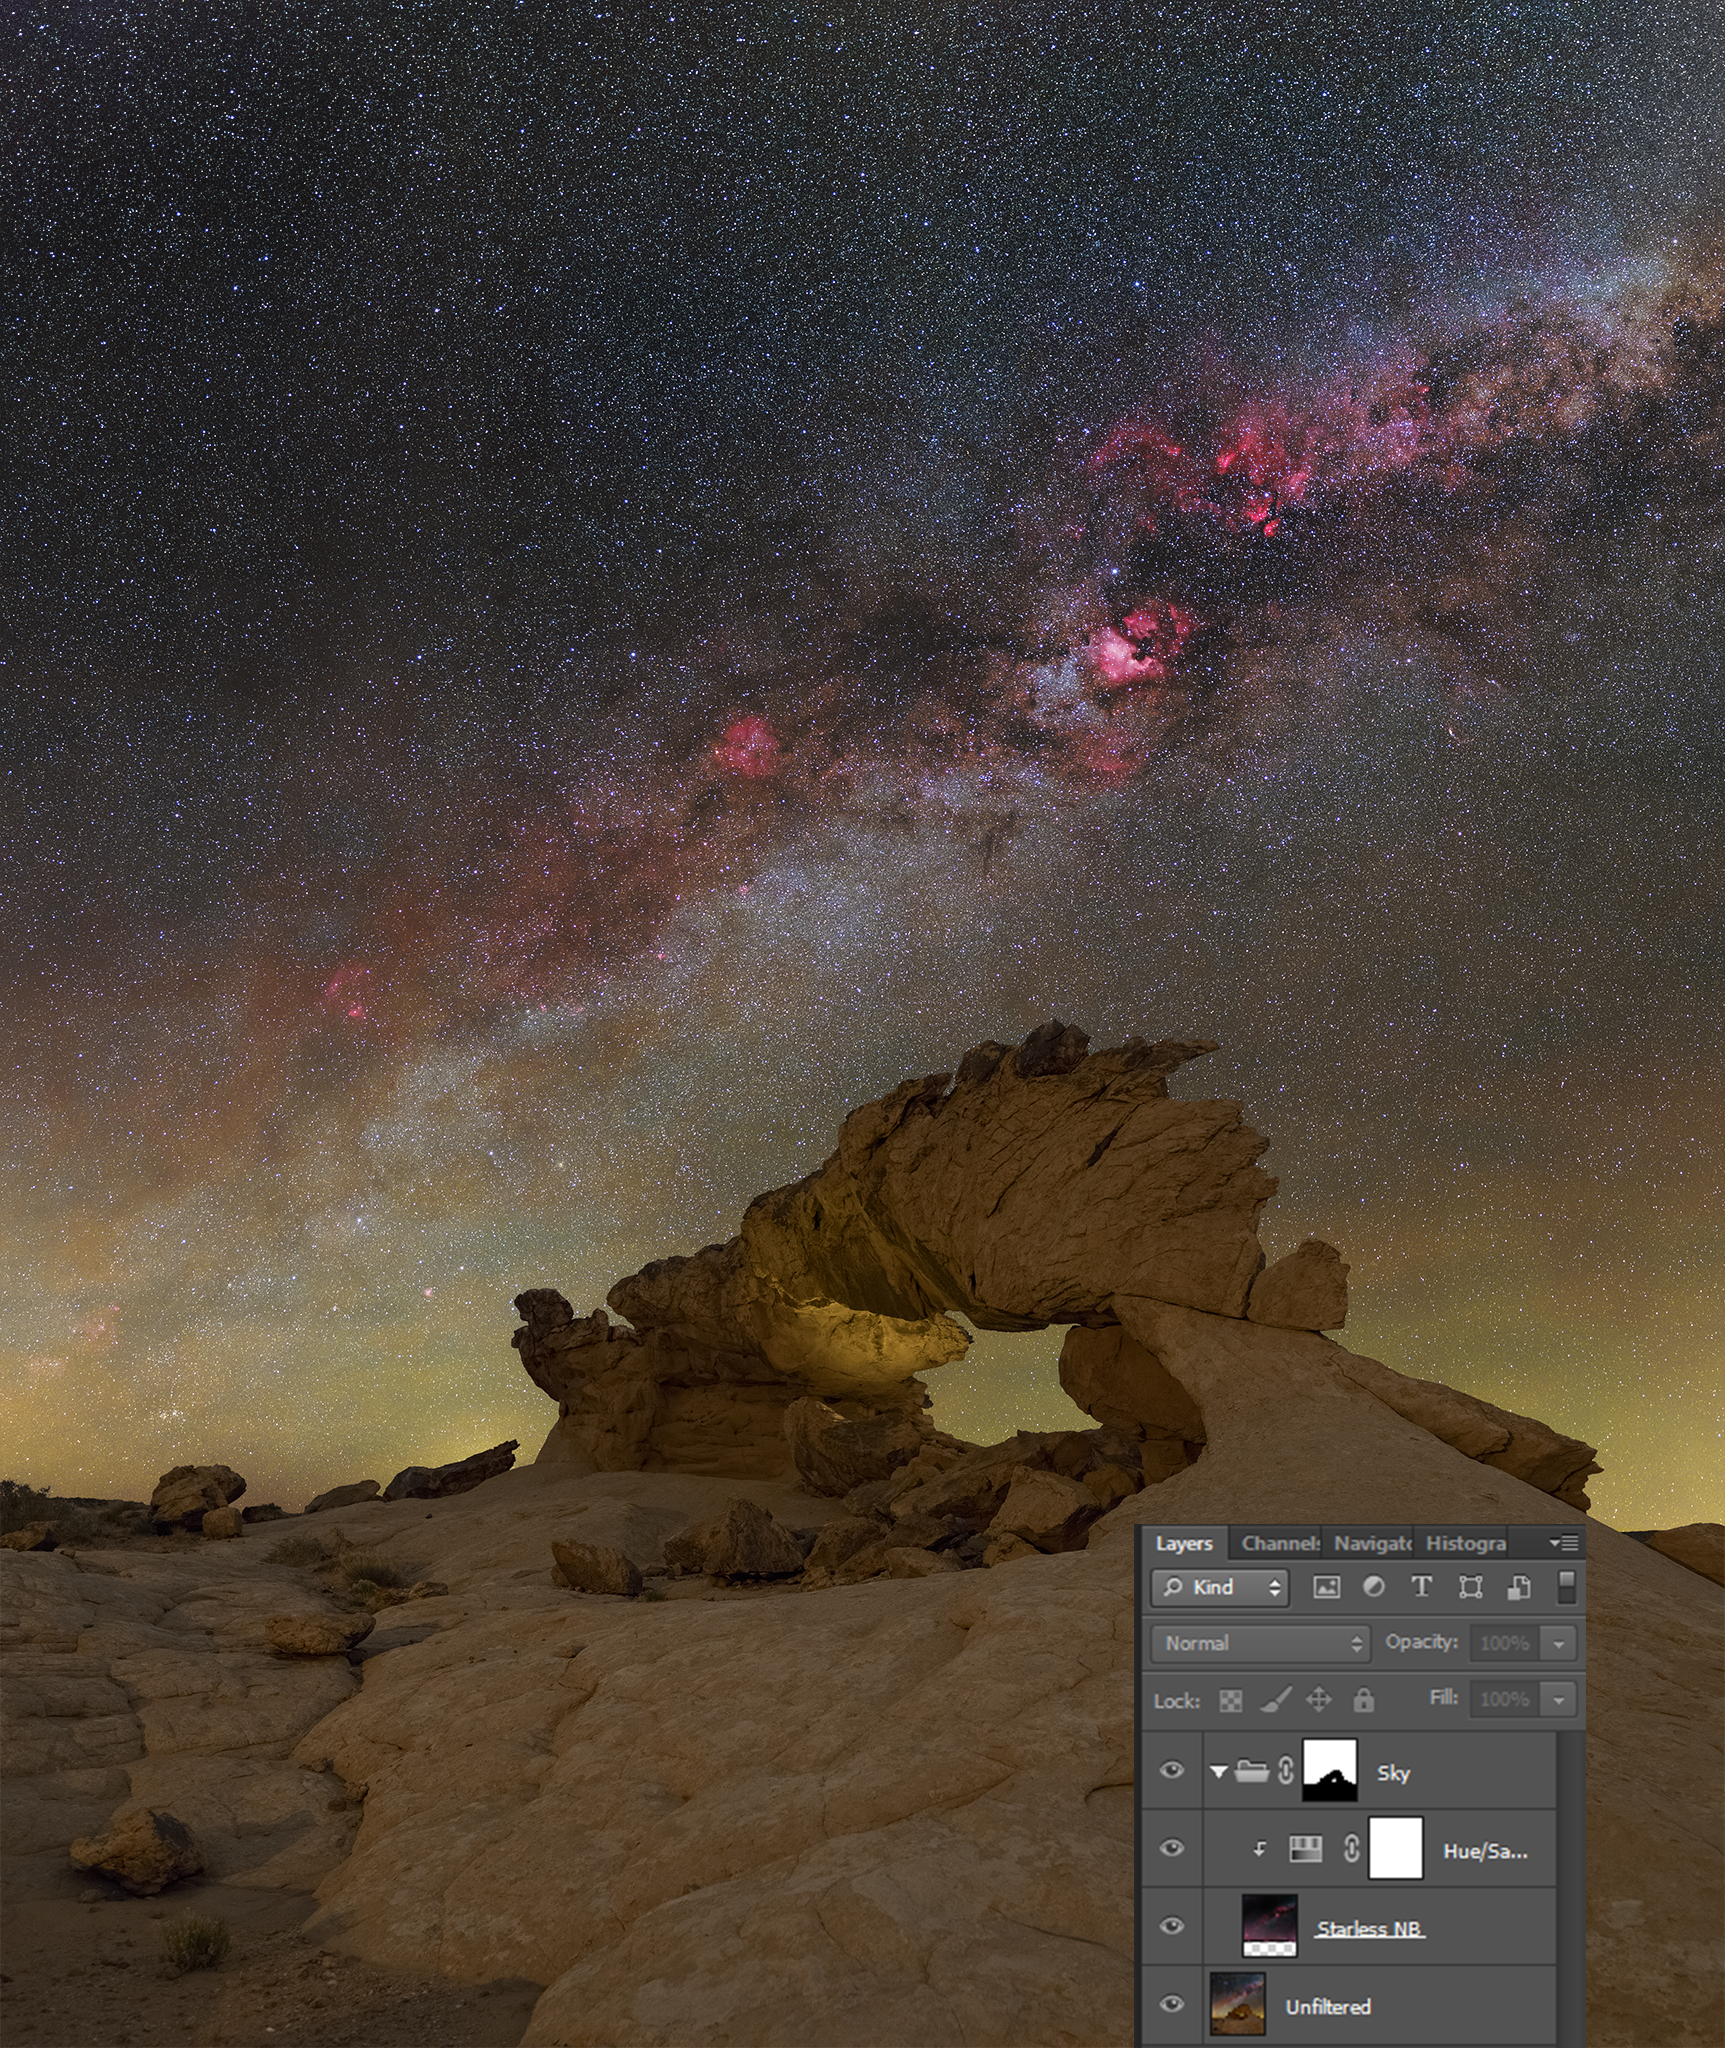
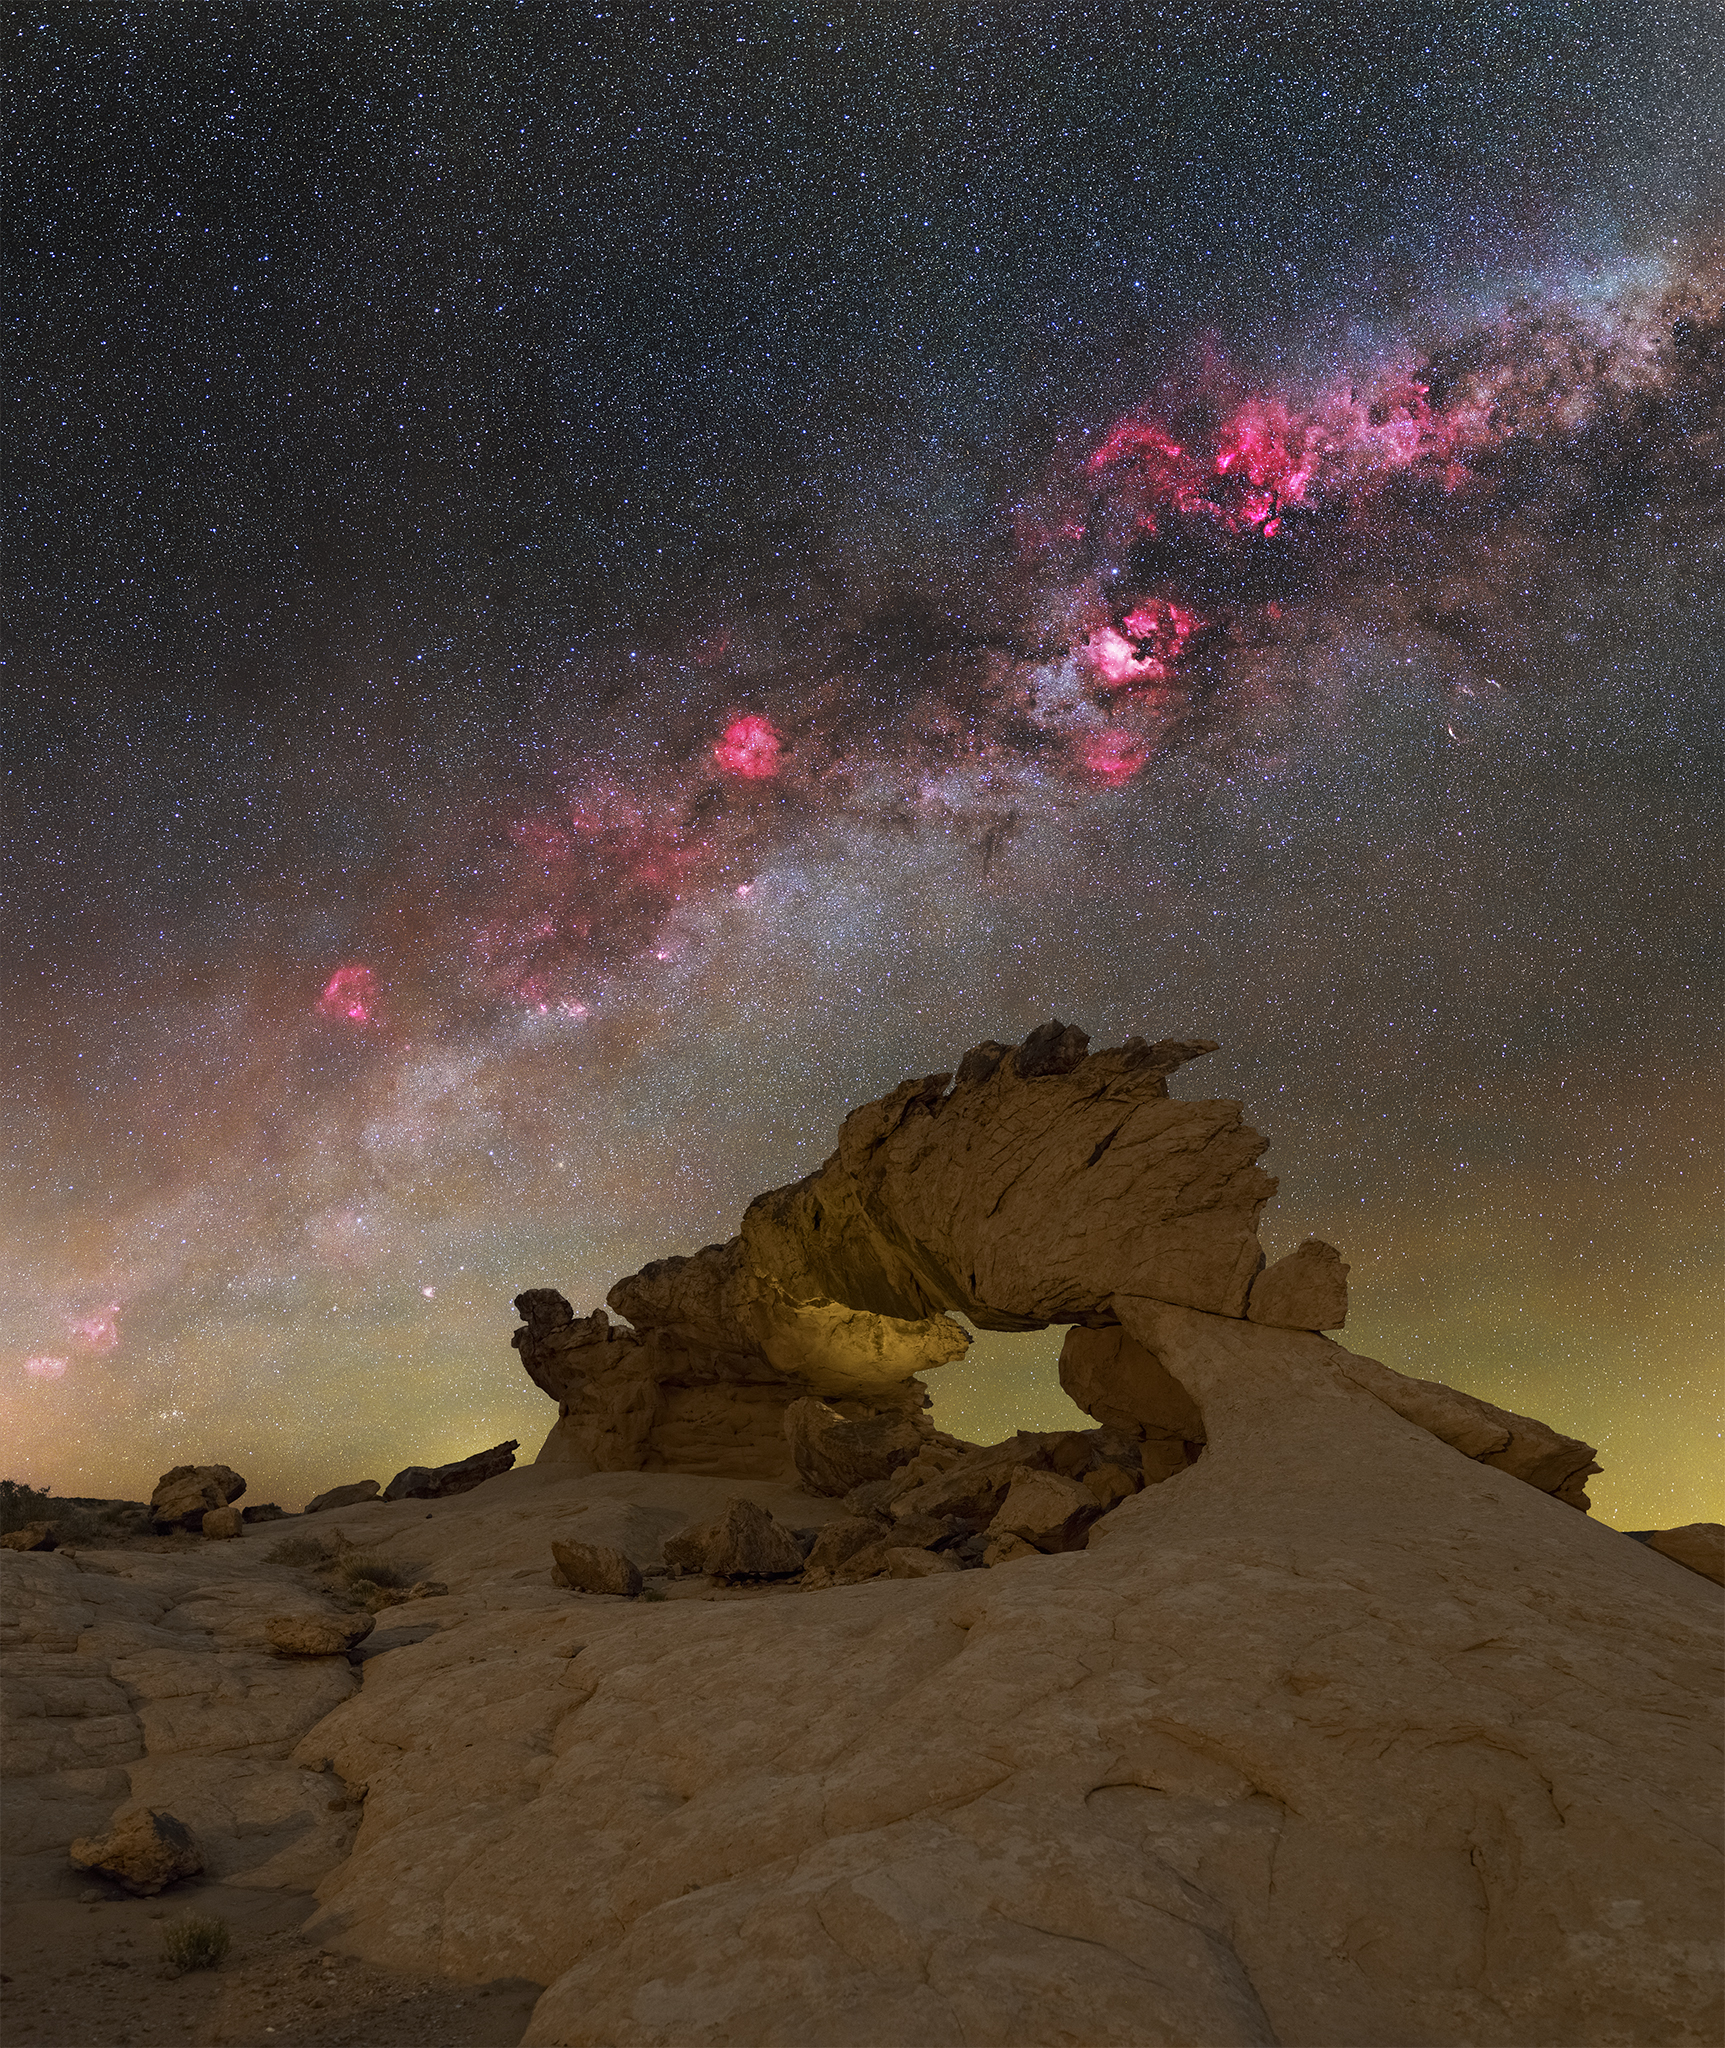
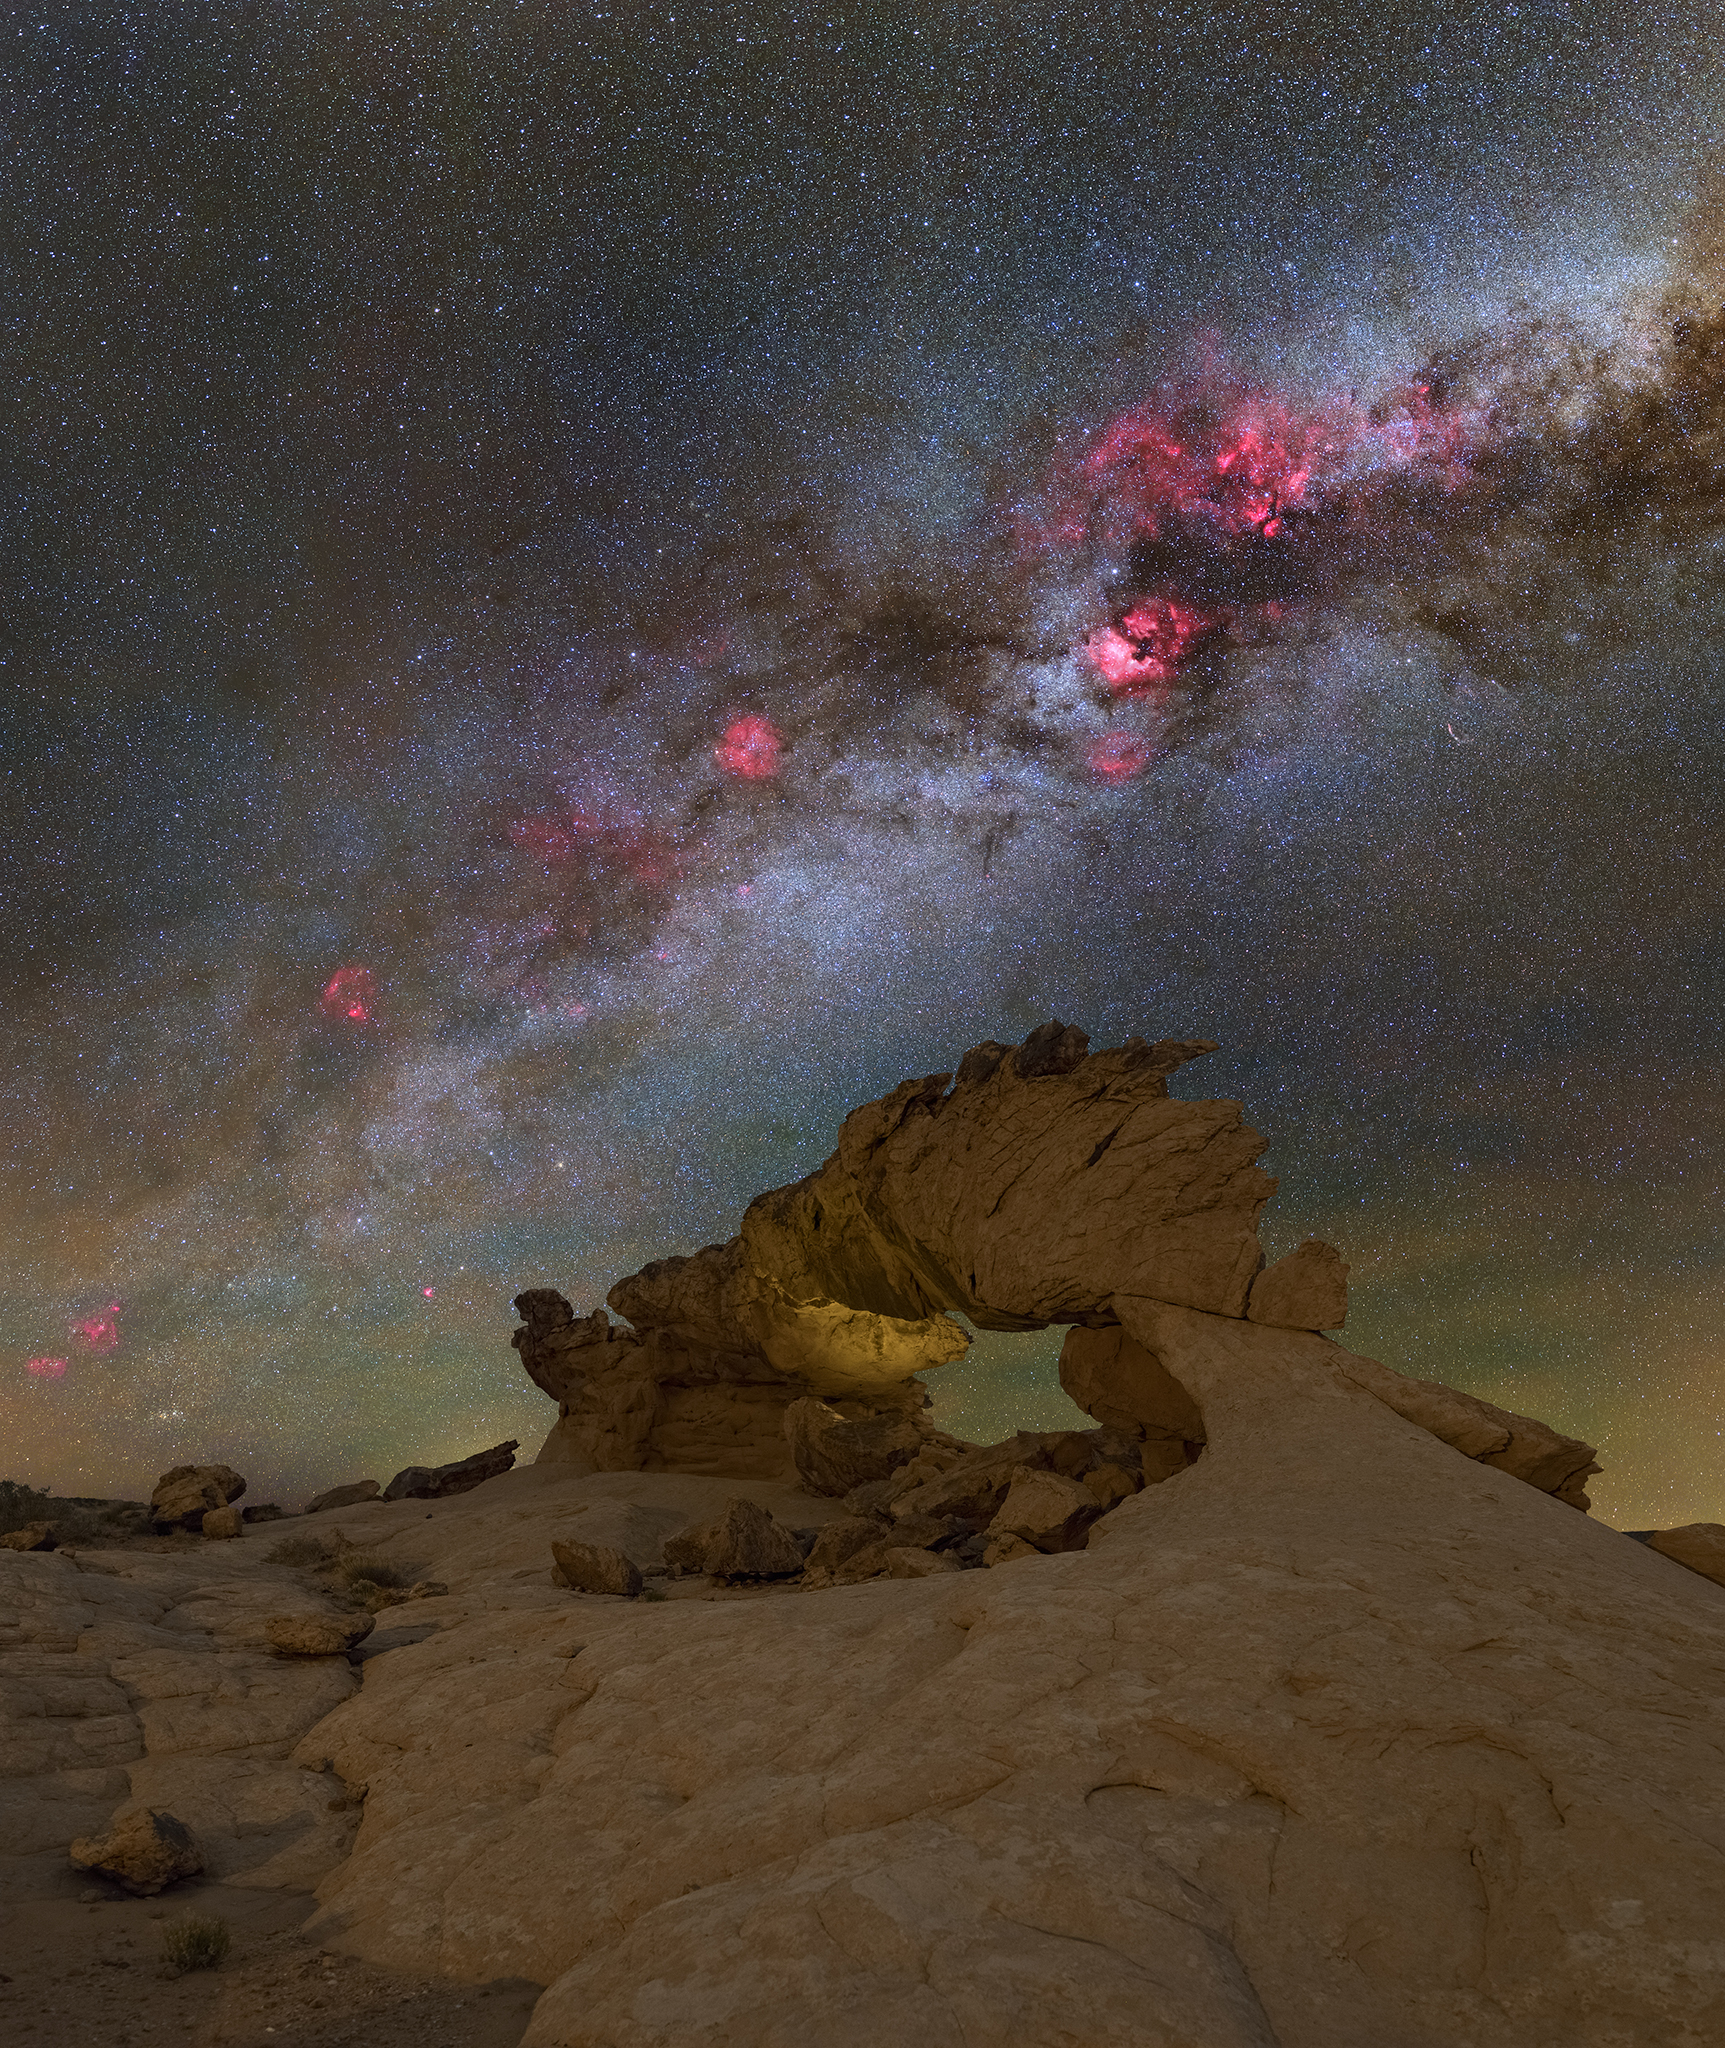
Consequently, we put the starless narrowband layer on top of the processed unfiltered image and use the blend modes in Photoshop’s ‘Lighten’ group. Lighten, Screen and Linear Dodge are blending modes that are worth a try. They all make the red Hydrogen-alpha nebulae more visible, but none of them is 100% convincing. In the example below, the best result seems to be the screen mode:
Lighten produces a seamless, but rather subtle ingrease in H-alpha detail.


Screen nicely boosts H-alpha data, but also affects star and sky background brightness and colors.
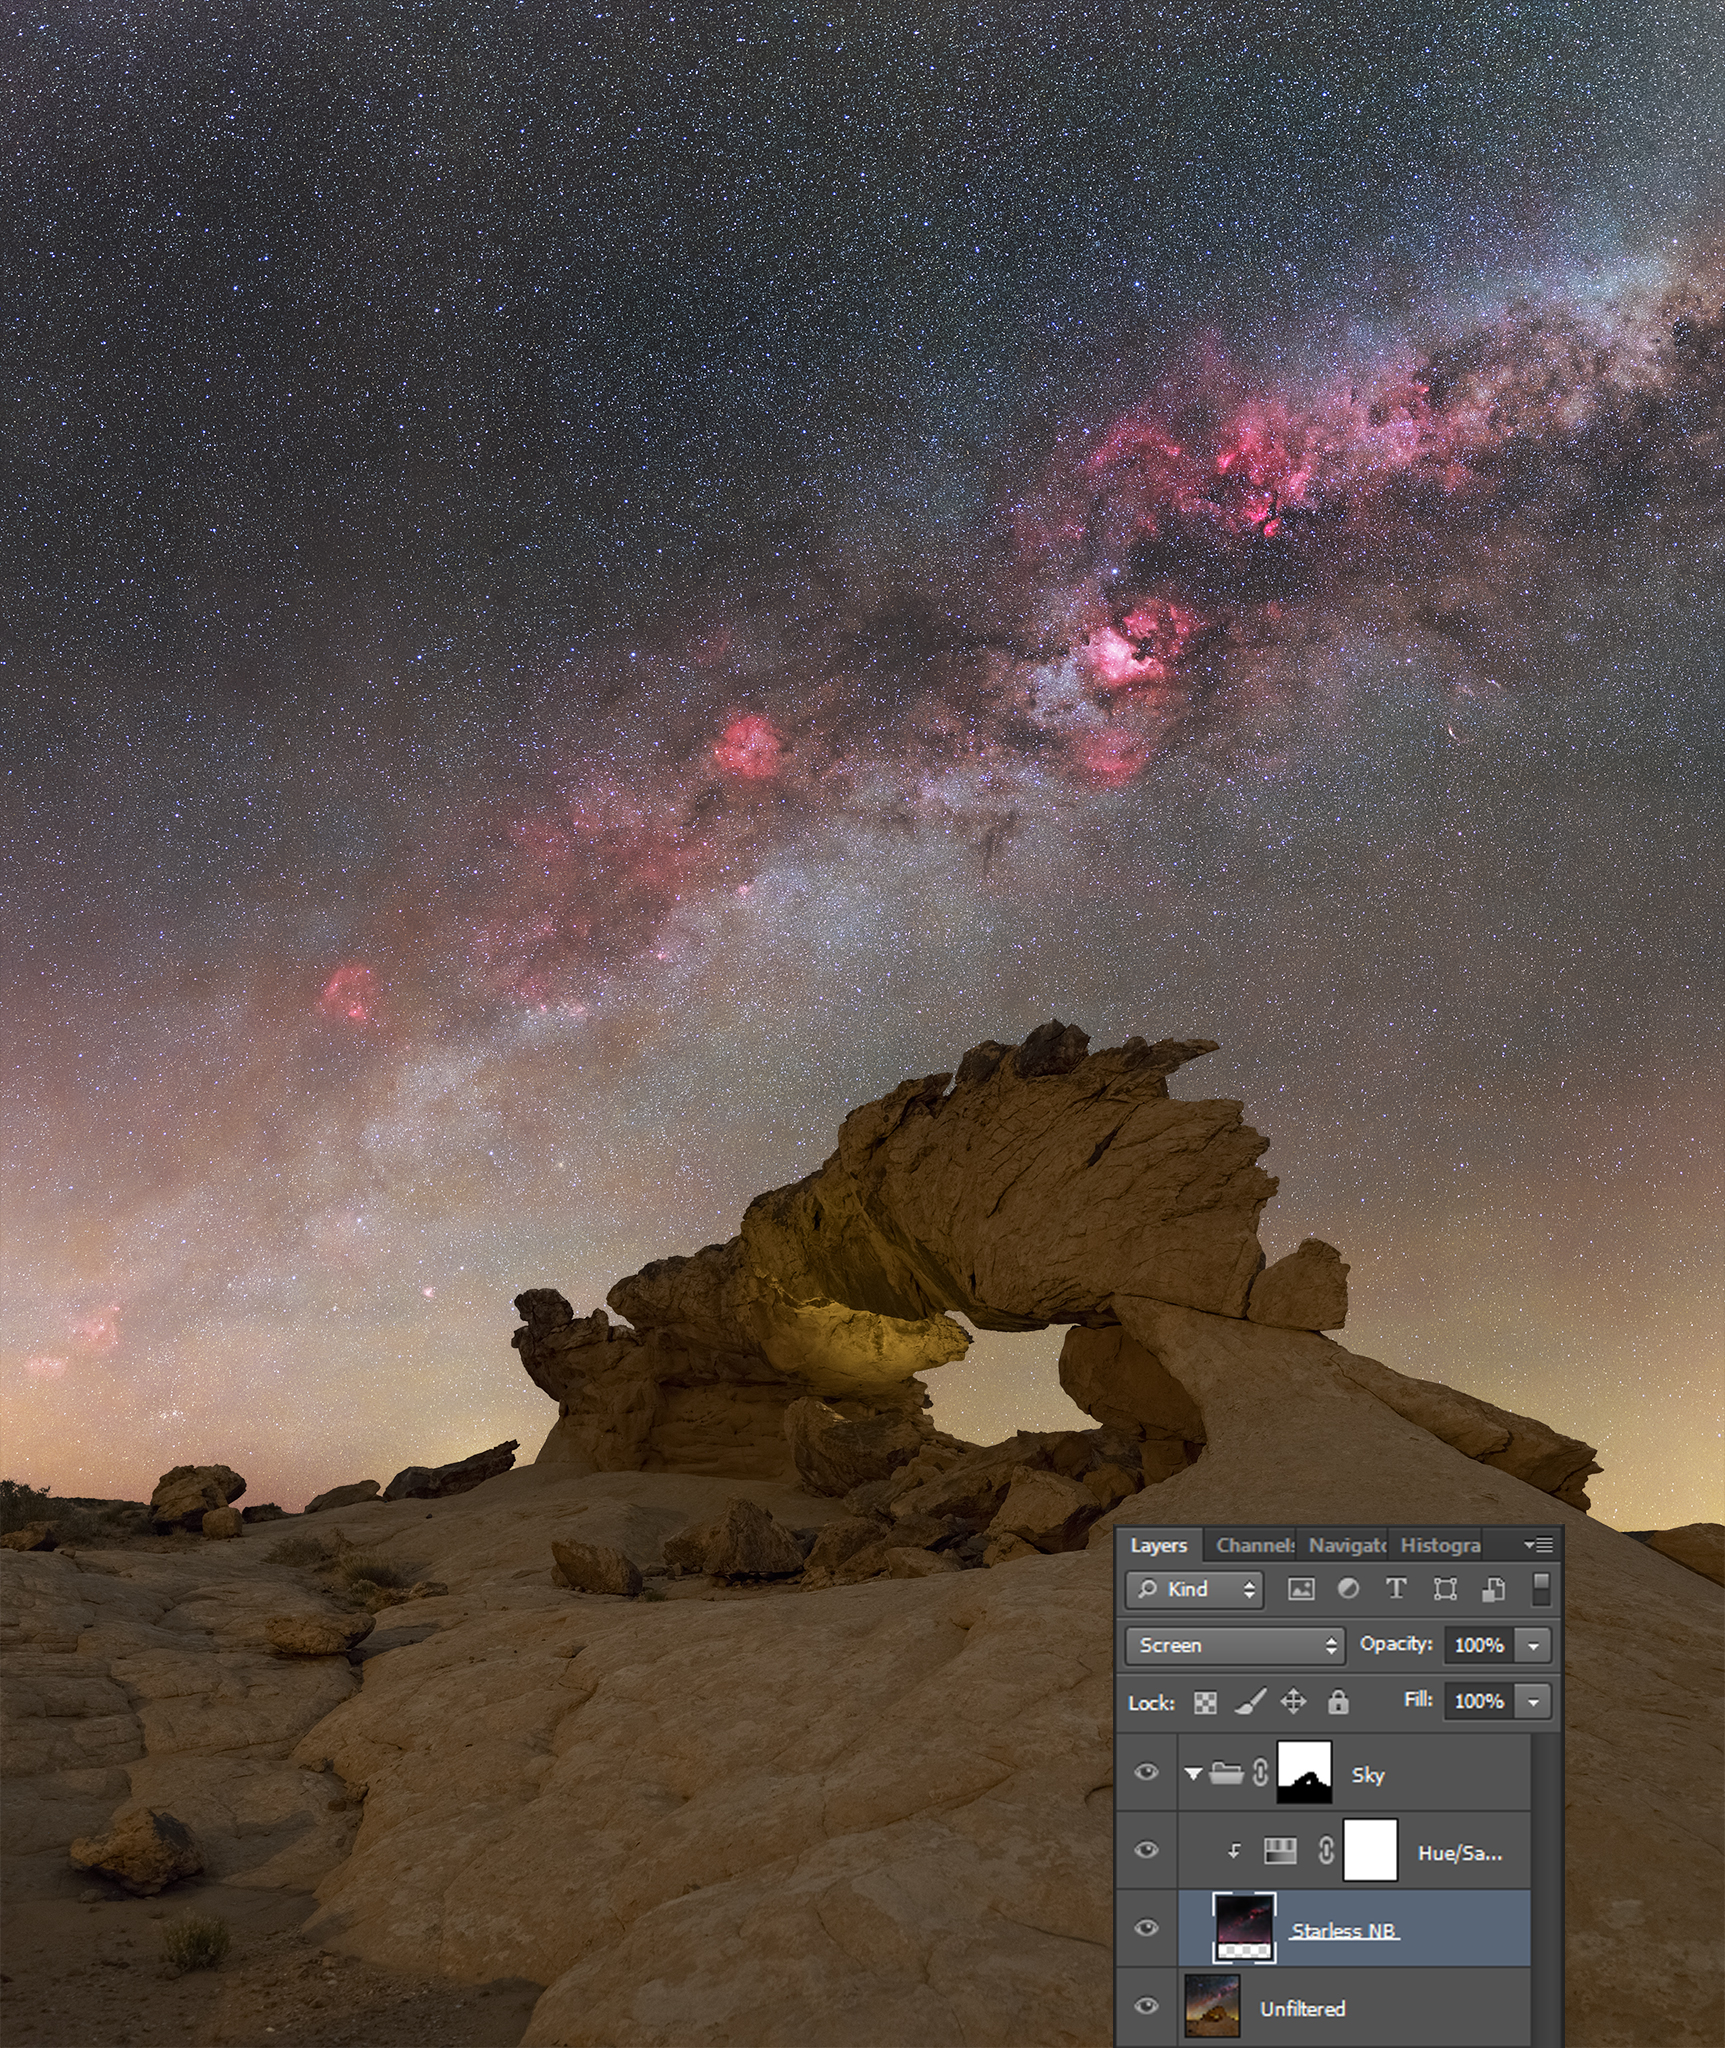
Linear Dodge boosts the dimmer nebulae, but burns out the brighter ones. It also affects star and sky background brightness and colors.

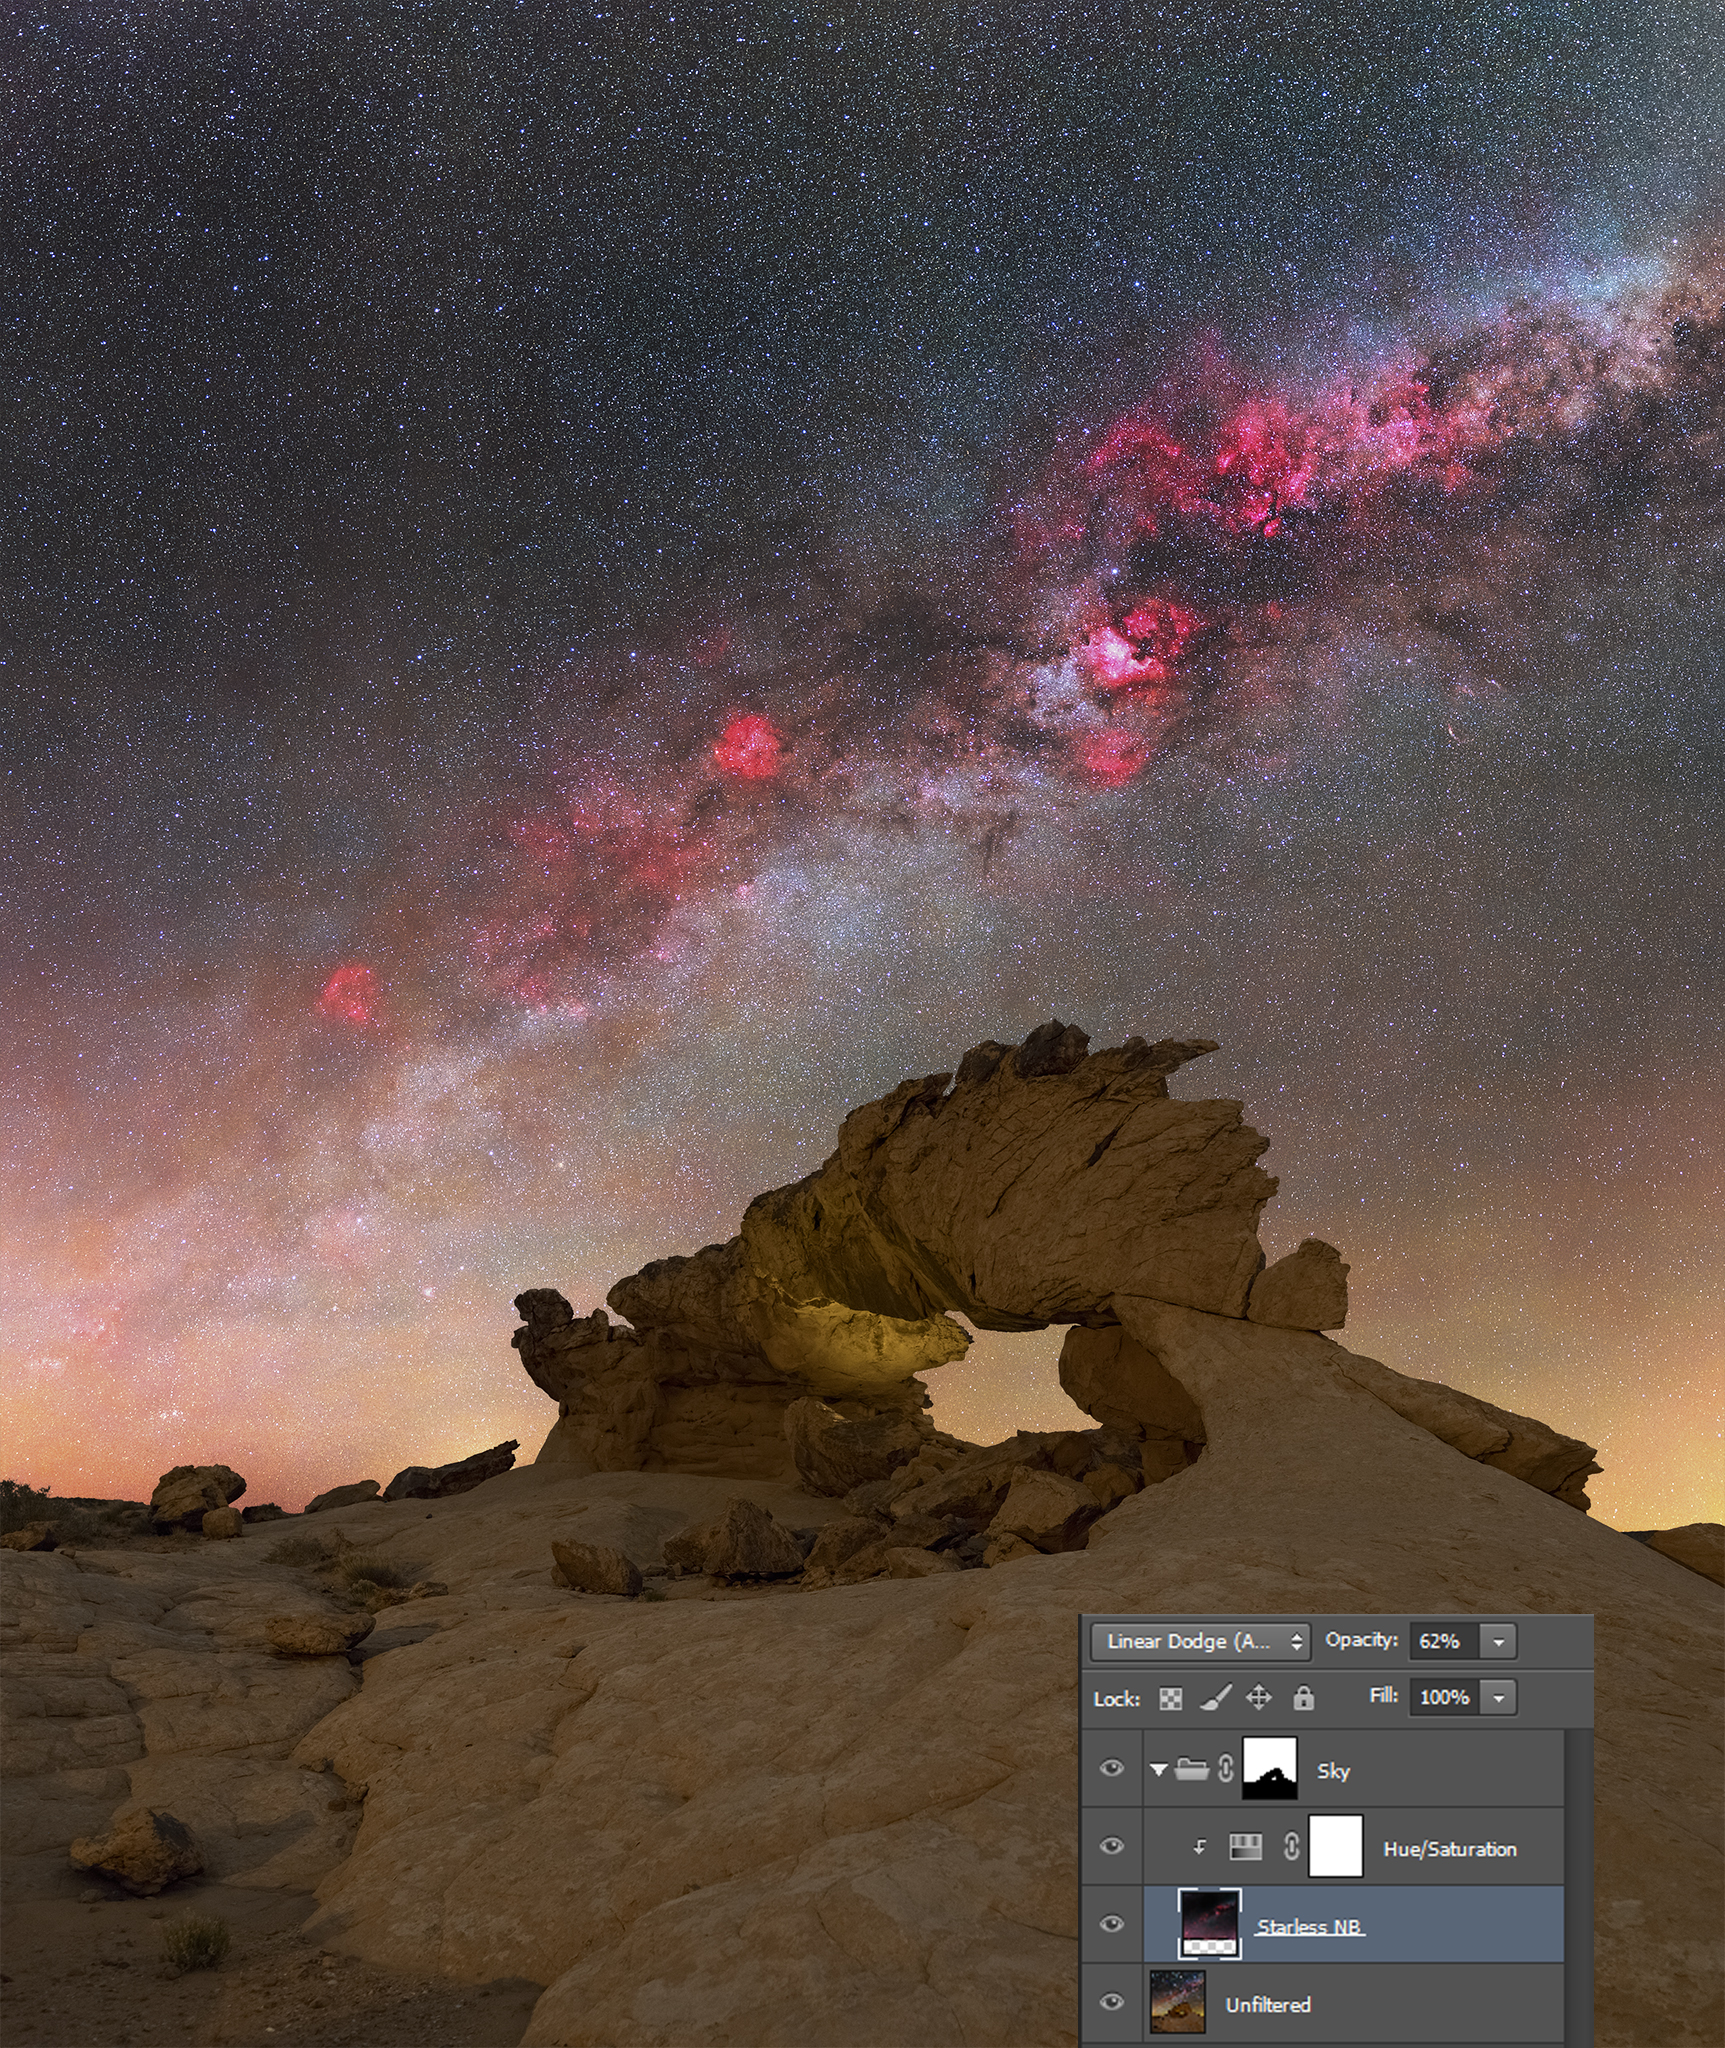
Of course, it is also possible to combine the different blending modes. With some innovative masking, the result can be drastically improved. In the example below, the red channel of the starless narrowband image was used as a mask for the narrowband integration. As above, Curves and Hue/Saturation layers help to fine tune the different blend modes, and a manual mask is used to protect the sky background away from the Milky Way band:
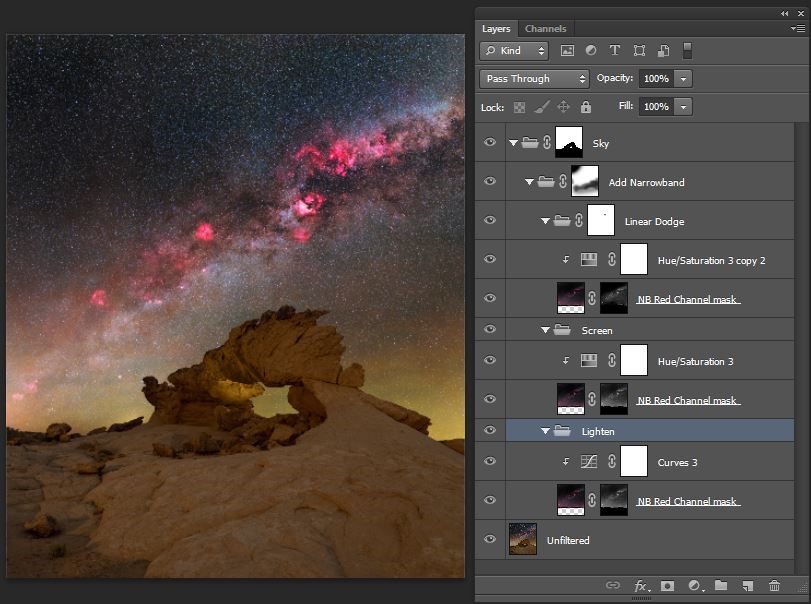


Different workflows and different processing programs will yield different results. Integrating narrowband data leaves room for personal taste. That’s a good thing. After all, astrophotography isn’t an exact science, but science inspired art.
Conclusion
With the new filter systems on mirrorless cameras, the use of narrowband filters has become much easier. The days where narrowbanding was reserved for advanced deep space nerds playing with monochrome cameras are definitely over. The integration of narrowband data has the potential for being as big a game changer in landscape astrophotography, as it has been in deep space astrophotography.
Stacking, tracking, and astromodified cameras have become common practices in landscape astrophotography. Narrowbanding is the next logical step. It will make landscape astrophotography once again more technical, both in the field and during post processing. Not everybody is going to like this development, but in my opinion, it is unavoidable.
Of course, it will always be possible to capture nightscapes with simple means, like a stock camera and a tripod, but more advanced photographers will continue to adopt deep space techniques into their workflow to maximize their image quality.


[…] my article about narrowband filters in landscape astrophotogrphy, I wrote about the limited availability of filters for the native Canon EF-EOS R adapter. My […]
LikeLike
When you photograph your foreground with an astromodified camera, do you use a filter (like a UV/IR Blocking/Cut Off (Hot-Mirror) Filters) so it looks“normal“ or does the foreground also have a red color shift that needs correcting? Or are you setting a custom color temperature in camera to „fix it“ ahead of time?
LikeLike
I do not use any filters for foregrounds with my astro-modified cameras.
Contrary to a full spectrum modification, an astro-modified sensor still has an UV/IR filter installed. An additional UV/IR blocker would therefore not have any effect.
Images captured with astro-modified cameras do have a red color shift, though. It is possible to correct this by using an OWB (original white balance) filter, but that isn’t needed for landscape photography.
I use a custom white balance in-camera, but that is only to help me asessing the image on the camera LCD. When shooting RAW, which you obviously should, white balance can always be changed in post processing. The in-camera white balance setting is therefore irrelevant.
As mentioned, setting the white balance to get rid of the red hue is sufficient for landscapes. For portrait or product photography, where color tones need to be 100% accurate, an astro-modified camera isn’t the best choice, though, or you should use an OWB filter.
LikeLike