

The longer I am engaged into shooting astro-landscapes, the longer my focal lengths seem to become. Some 2 years ago I started shooting ‘deepscapes’ (landscape astrophotography with deep scape objects dominating the sky), which mercilessly revealed the limits of my little tracking mount.
I therefore found myself looking for a mobile astrophotography mount that has the capability for deep space imaging at medium-high focal lengths and still fits into a backpack to be taken on a hike.
To be usable for deep space imaging, such a mount has to meet a few requirements:
- GOTO capability
- Computer control
- 2-axis guiding capability (RA & DEC)
- Enough load capacity to carry a deep space imaging rig
I soon found that the selection of lightweight mounts that meet these requirements is rather limited.
There were the new harmonic drive mounts, like the Rainbow Astro RST135 or the HOBYM Crux 140 Traveller, that would have required me to sell a kidney to pay their step price of 3500$ or more and I decided that I was not prepared to do that just yet.
In 2020, I found the Sky-Watcher AZ-GTI, which I initially ruled out, as it is an ALT/AZ mount and therefore not suitable for astrophotography. After reading several reports of imagers who had apparently modified the AZ-GTI to make it an equatorial mount, I decided to give it a try.
Meet the Skywatcher AZ-GTI
The AZ-GTI is a modern mount with built-in WIFI that can be controlled with Skywatchers SynScan app from any Android or iOS smart device. The size of the mount head is similar to Sky-Watcher’s well-known Star Adventurer tracking mount.

The Sky-Watcher hompage describes the AZ-GTI as follows:

- Multi-purpose alt-azimuth mount
- 11 pound payload capacitySynScan
- Go To telescope mount with 42,900 object+ database
- Built-in WiF
- iControlled with SynScan Pro app for iOS and AndroidFreedom
- Find Dual encoder technology
- DC operation (batteries not included)
In its regular package, the AZ-GTI comes with the mount head, pier extension and tripod and sells for a very competitive price that is even below Sky-Watcher’s Star Adventurer 2i tracking mount.
As the provided tripod does not fold small enough for my purpose, I only bought the AZ-GTI head and the pier extension..
In spring 2022, Sky-Watcher started selling the Star Adventurer GTI, a equatorial mount with the same functions and load rating as the AZ-GTI. It presently sells for 265$ more than the AZ-GTI. If you are not willing to do the DIY tinkering described below and are prepared to pay the 265$ premium for a mout that is astrophotography ready out of the box, you can stop reading, as this may be the right choice for you.

Still here? I therefore guess that you want to know how to get the same for less. So here we go…
Modifying the AZ-GTI for astrophotography
As Sky-Watcher decided to sell its Star Adventurer GTI for for a considerably higher price, modifing the AZ-GTI into an astrophotography package still make sense for the budget aware astro photographer. As mentioned, this means that the mount needs some DIY tinkering to make it astrophotography capable. This includes:
- Updating the motor firmware
- Mounting it on an equatorial wedge
- Finding a counterweight solution
- Finding a way to polar align the mount
Updating the motor firmware
Out of the box, the AZ-GTI is not able to be operated equatorially. You must first update the motor firmware. The required firmware, as well as a Windows Motor Controller Firmware Loader, is available on the official Sky-Watcher webpage under: http://skywatcher.com/download/software/motor-control-firmware/
Unfortunately, Sky-Watcher does not offer a solution to update the firmware from an Apple computer and you therefore need access to a Windows PC.
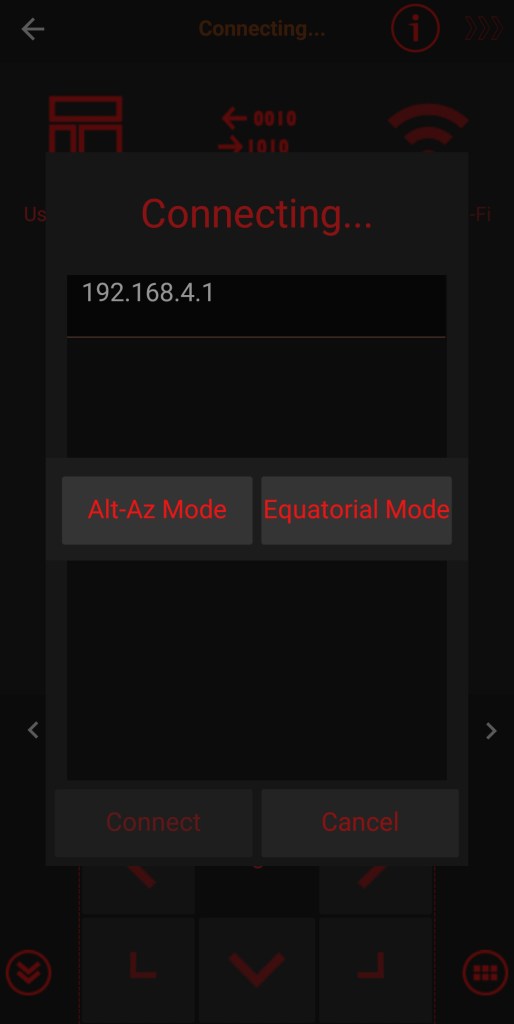
Once the motor firmware is updated, you are asked upon initialization of the Synscan app, whether the mount is operated in ALT/AZ or Equatorial mode.

Strangely, Sky-Watcher seems to try to shy its customers away from using the mount for astrophotography and mentions in the description of the firmware update, that astrophotography performance is not guaranteed. This is funny, as no mount can guarantee good astrophotography performance, if you do not know what you are doing.

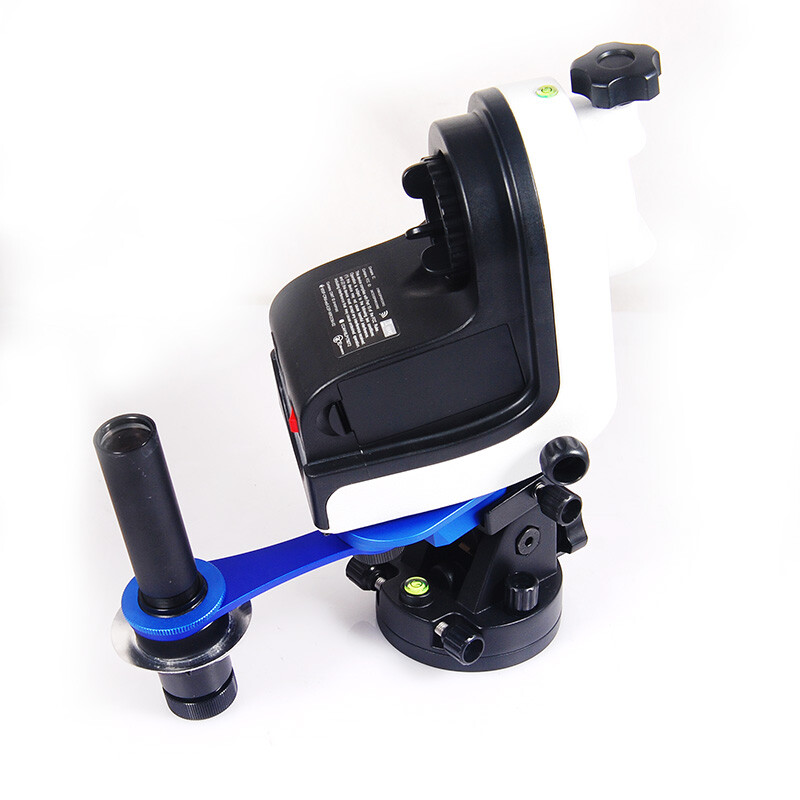
Mounting the AZ-GTI on an equatorial wedge
After updating the firmware, you need to mount the AZ-GTI on an equatorial wedge. Basically the wedge from any tracking mount can be used for this. The iOptron and the shiny red William Optics wedge work out of the box,
The Sky Watcher Star Adventurer wedge however needs a small adjustment. The screw for the Vixen style mounting bracket on the Staradventurer wedge needs to be replaced, because its handle is too wide and blocks the rotation of the mount. As the screw has a standard M8 thread, you can simply use a n inexpensive M8 screw for this purpose. To eneble me to lock the screw tightly without any tools I found the following solution: By sawing off the head of an M8 screw and replacing it with a winged nut, countered with a regular nut, I get a nice handle that does not block the rotation of the mount.

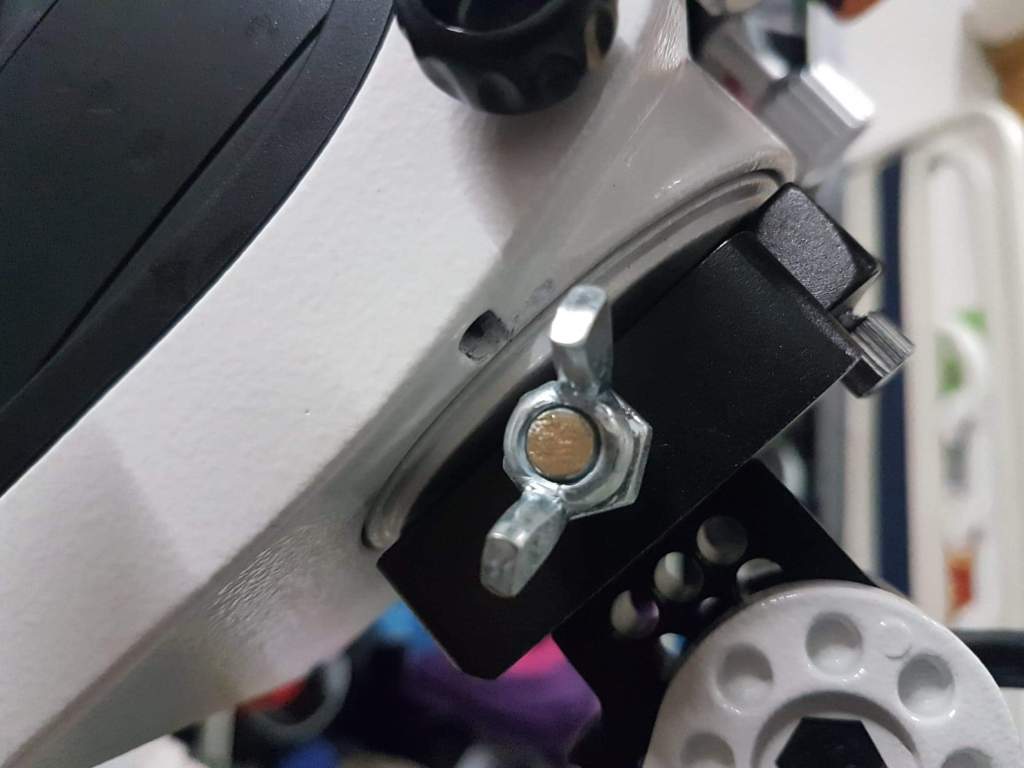
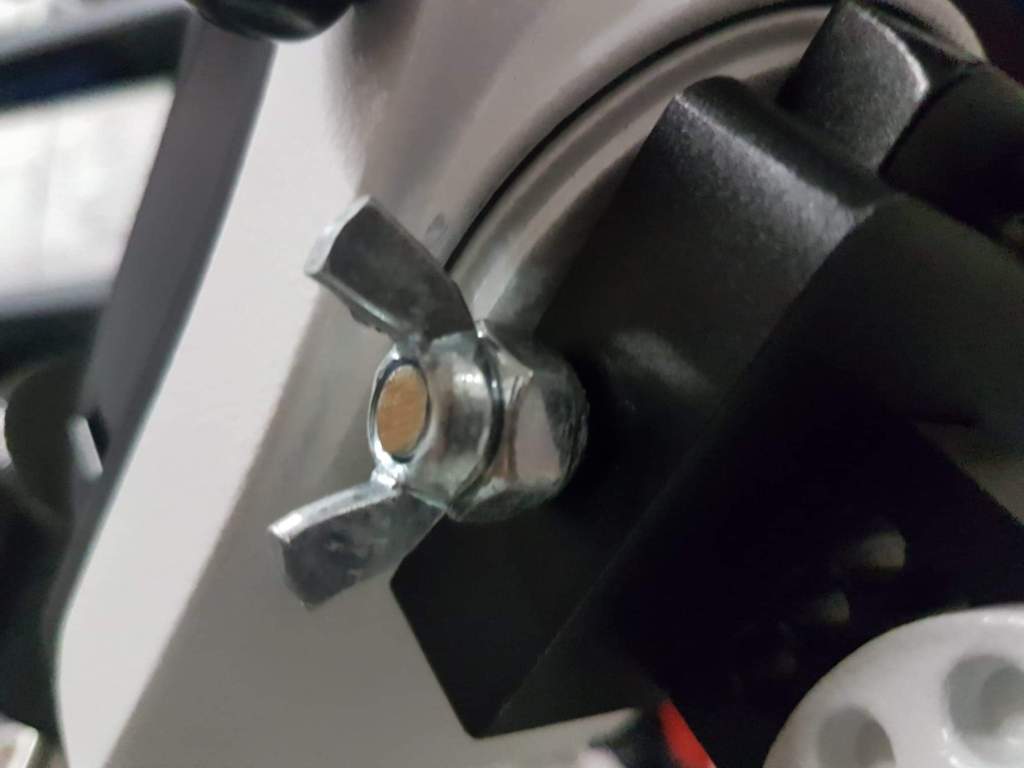
Replacment of the original screw with a winged not is a cheap and easy solution
In any case you will need a Vixen style mounting plate that screws into the tripod tread of the AZ-GTI to attach the mount head to the bracket on any of these wedges. If like me, you decide to buy the Stara Adventurer wedge, you have the advantage that it comes with such a plate that perfectly fits the AZ-GTI and ensures that the plate cannot slip from the wedge or unscrew from the mount head.

Another thing to worth noting is that the AZ-GTI sits on the wedge in the opposite way to a normal tracker. Instead of dialing in your latitude, you therefore have to set it to 90° minus your lattitude. That’s no problem for the Skywatcher wedge, which covers a full 90°. Depending on your latitude, it could however pose a problem for wedges which cannot be adjusted over a 90 degrees range, like the William Optics wedge for low lattitudes. For the William Optics wedge for high lattitudes this is not a problem as its operational range of 32°-59° means that it is usable from 31°-58° with the AZ-GTI.

Finding a counterweight solution
A properly balanced mount is important for good tracking and you therefore need a counterweight bar for the AZ-GTI. The mount has an M12 tread for exactly this purpose, but strangely Skywatcher does not offer any bar that fits. You can find commercial solutions for this problem on eBay or AliExpress, but why spend 35-70$ for something you can bulid on your own from parts you can buy in any hardware store for a few bucks? All you need is a traded M12 bar, three M12 nuts, a winged nut, a treaded spacer and of course a 1 kg counterweight with an appropriate 12mm drilling.

I cut my 1-Meter treaded bar into two pieces of 40cm and 60cm. The shorter bar is perfect for balancing my rig with photo lenses, while the longer bar nicely balances the mount if I use my heavier 500mm telescope.
Finding a way to polar align the mount
The best mount is of no use if you cannot polar align it. Due to its native ALT/AZ design, the AZ-GTI has no polar scope. There is a polar alignment routine without the requirement for a polar scope in the Synscan app, but it is not very accurate and it requires the use of a finder scope. I therefore do not recommend using the Synscan app for polar alignment.
Again, there are third party solutions available, like e.g. the polar scope adapter from Artesky.
This certainly works, the best solution is probably the use of a computer for electronic polar alignment with plate solving technology, for which you of course need a computer.
Computer controlling the AZ-GTI
While you can use the AZ-GTI as a standalone solution as described above, a computer is needed to unleash the full potential of this little mount.
For exposures over 1-2 minutes with higher focal lenths, you will need autoguiding to avoid star trailing due to gear imprecisions. Furthermore, a computer gives you access plate solving software, which as mentioned, can be used for precise electronic polar alignment without a polar scope, for increasing GOTO accuracy and to precisely frame your compositions.
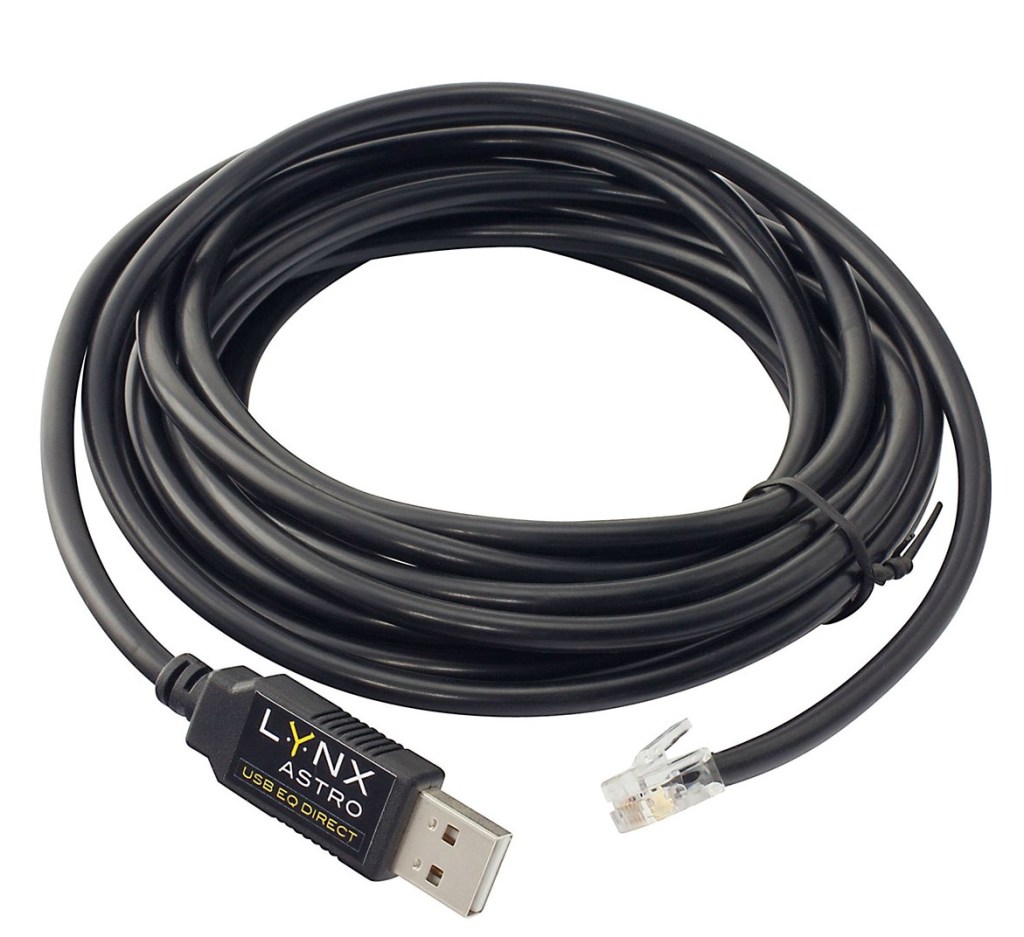
While the built in WIFI lets you connect some computers wirelessly with the mount, I found it much easier and stable to use an EQDIR cable.
Dragging a laptop computer into the field may not sound very tempting and fortunately there is no need for this. There are several Raspberry Pi (e.g. ASIair, StellarMate, Astroberry) based solutions available that can control your entire rig.

Power Solutions
The AZ-GTI can be internally powered by 8 AA batteries, or via an external 12V connection.
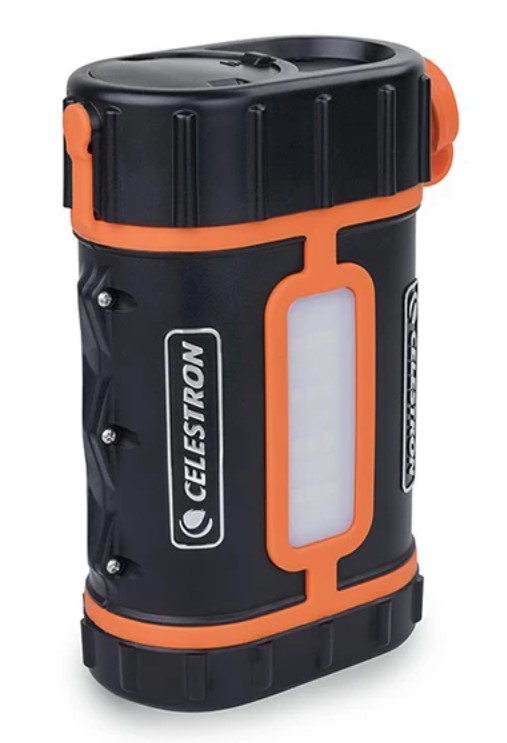
As I require 12V power supply for my cooled astro-camera and my ASIair microcomputer, I use the Celestron Power Tank Pro Lithium, which can supply my entire rig for at least 2 nights.
The AZ-GTI in operation

How does the AZ-GTI perform in a real life environment? I’d say amazingly well.
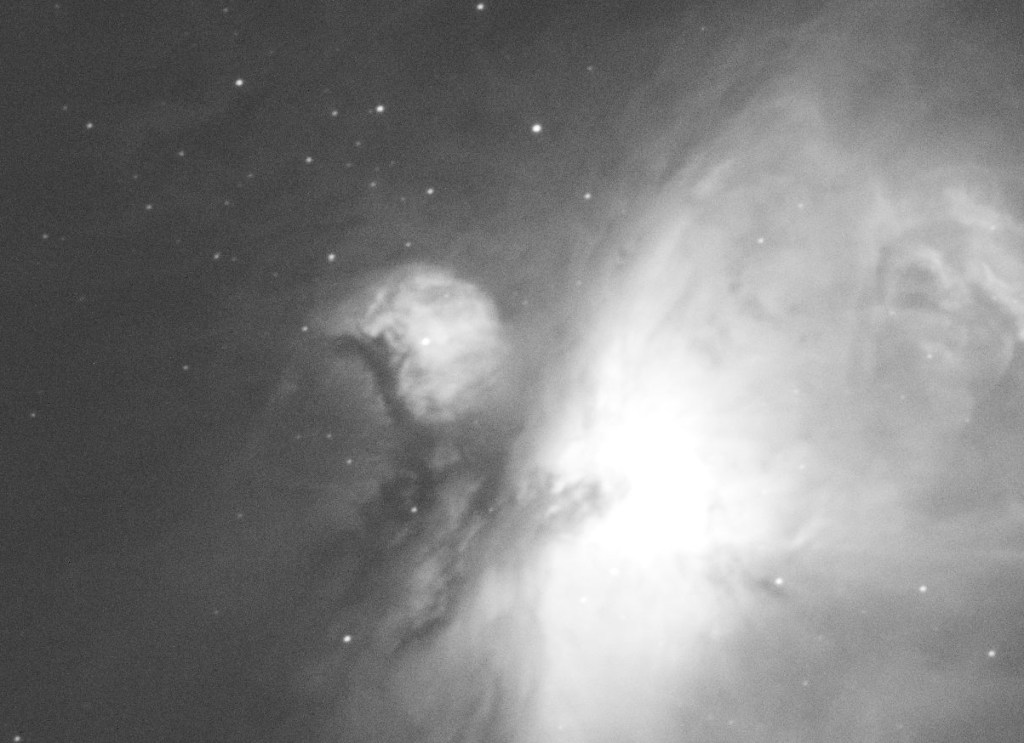
This is an example of a 2 minute guided exposure taken at the 5kg load limit of the mount at an equivalent full frame focal length of 1000mm using with my 500mm telescope and the micro 4/3 astro camera shown in the image above.
This example shows perfect round stars in a 5 min guided exposure at 200mm equivalent full frame focal length:


As these images prove, the AZ-GTI is a very capable mount for deep space imaging and thanks to its small size and weight it is the perfect choice for deepscapers who need to hike to their shooting spots to get that perfect alignment.


You may get me into this field of photography yet! Great article, very well done and a great read even for a complete novice in this field. Thank you, Jeff
>
LikeLiked by 1 person
Thank you very much, Jeff. I am glad that you like the article and if I really get you into this kind of photography, that would be an awesome award.
LikeLike
Hi. amazing article. A lot of information that isn’t easily found. I’m working on this type of photography at the current time and your articles are God send. Helped me fix a lot of simple mistakes that I was making so thank you very much. Would it be possible to also make one on how to blend together the final dso image with the foreground and what kind of exposures you use for the foreground(as well as time of capture)??
LikeLiked by 1 person
Hi Tamem
Glad that you find the article helpful. I will see what I can come up with about the blending topic. That’s definitely a good idea for an article.
You can find the EXIF data for my skies abd foregrounds at the end of the image description in my posts on IG, Facebook, Flickr and Vero, but basically I either double the exposure time or the ISO compared to the sky exposures.
LikeLike